

Dr. Mike Miyasaki
In past newsletters we have seen beautiful aesthetic veneer cases and amazing full-mouth cases performed by gifted colleagues. The core of the PAC philosophy is that we teach and do comprehensive dentistry restored aesthetically. In this article I would like to cover one of our bread-and-butter procedures, that of a simple direct restoration. I like to explain to doctors that if they understand how to do a single restoration properly they can build upon that knowledge and successfully do 10 veneers or a 28-unit full mouth restorative case as we have seen. But the opposite is also true, not knowing the why’s and how’s of a simple direct restoration will doom the success of our larger cases.
One of our corporate partners is Danville. Danville has had a deep history being in the business of microetchers and restorative materials for almost 30 years, and they are a company I have followed for almost all that time. I am privileged to be part of the Danville team where I get to be involved in the testing and development of materials.
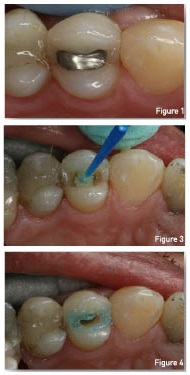
In this issue of PAC TEC I’d like to show the thought process behind doing a posterior direct restoration (Figure 1).
I will assume you know how to do the preparation, but I joke with the doctors, half in jest, that we have to remove all the decay. If we leave infected dentin behind there is good chance the patient will experience sensitivity because the restorative material cannot bond to a decayed surface.
When in doubt I recommend using a caries detector, such as, Caries Finder (Figure 2). The next step is to insure good isolation as it is a must. If you cannot keep the area free of moisture or blood, use a rubber dam, an Isolite or more cotton rolls. If you have used Caries Finder I find a blast with my microetcher and a 27 micron abrasive is a great way to clean the preparation (Figure 3).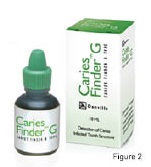
I then scrub the preparation with Chlorhexidine and rinse, and then apply MicroprimeG. The use of these two agents inhibits the metalloproteinases (MMPs) activity that breaks down our hybrid layer and combats sensitivity. Dentin matrix metalloproteinases are a family of host-derived proteolytic enzymes. Most MMPs are synthesized and released from odontoblast and are activated by modern self-etch and etch-and-rinse adhesives which have the ability to hydrolyze the organic matrix of demineralized dentin which can result in reduced bond strength (Figure 4).
I follow a Selective Enamel Etch technique placing 37% Sure Etch phosphoric acid gel on the enamel margins, keeping it off the dentin.
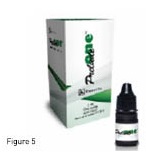 After 10 seconds I rinse the etchant off and leave 7th generation universal bonding agent Prelude One and rub it into both the enamel and dentin for 20 seconds, thin with air and evaporate the ethanol carrier. This is cured for 10 seconds and the dentin treated with a self-etching agent should be properly etched to avoid sensitivity (Figure 5).
I place a layer of flowable ZNano composite over the dentin and then a small layer of sculptable ZNano, each of the appropriate shade, and adapt both to the walls of the preparation thinking about the C-factor when placing the 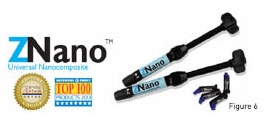 restoration and the polymerization shrinkage stresses placed on the tooth during curing that could lead again to pain on chewing (Figure 6). ZNano is a nano particle sized composite with Zirconia giving it fantastic wear characteristics and a long-lasting shine. Be sure your curing light is putting out the right amount of light. Many lights today have built-in radiometers, but under-curing is common because of compromised lights or placing deep amounts of composite that prevent the light from penetrating down to the deepest areas of the restoration. The restoration is built up and cured. I like to cure for 20 seconds to ensure maximum conversion of the material.
And lastly check the occlusion (Figure 7). I always slow down here and try to get it right the first time, but I always advise the patient to 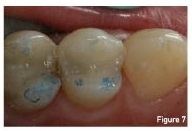 return if when the anesthetic wears off the bite does not feel even or comfortable. Follow these steps and you should have very happy patients whether you place the restoration in the back or front of the mouth, a single unit or multiples.
If you have questions about my article or if you would like to send a case, please contact the Pacific Aesthetic Laboratory Group at www.pacificaestheticdentalstudio.com, Gary Vaughn or Ryan Corr at (916) 786-6740, or via e mail [email protected] or [email protected].