

Dr. Jack Griffin
We sometimes get so focused on preps and porcelain that we forget about the soft tissue. Often the management of the pink stuff can often be the difference between excellence or mediocracy with a case. Before any complex restorative or aesthetic case is started the gingiva must be evaluated and its management must be as thoroughly accounted for as our preparation design and cementation techniques.
When restoring a missing tooth by fixed bridge or implant, the height, width, and health of the papilla must all be managed as early as possible. The dreaded “black triangle” of a blunted papilla or resorbed ridge can be as much a failure as a botched shade or bad contours. And once gone, papilla are particularly hard to recover or restore.
Management at extraction
The best way to avoid unwanted gingiva loss is to manage it from the moment the tooth is extracted. In the aesthetic zone, immediate placement of the implant, healing abutment, and contoured temporary is highly recommended. However, for various reasons, a cemented bridge may be necessary.
In this case a patient presented with a necrotic tooth and a less than ideal aesthetic presentation (Fig 1). Tooth #8 was necrotic but there was a fistula above tooth #9 with a large amount of external resorption (Fig 2). The defect was seen from the lingual (Fig 3). After endodontic therapy was performed on #8, tooth #9 was extracted (Fig 4). The patient chose a fixed bridge instead of an implant.
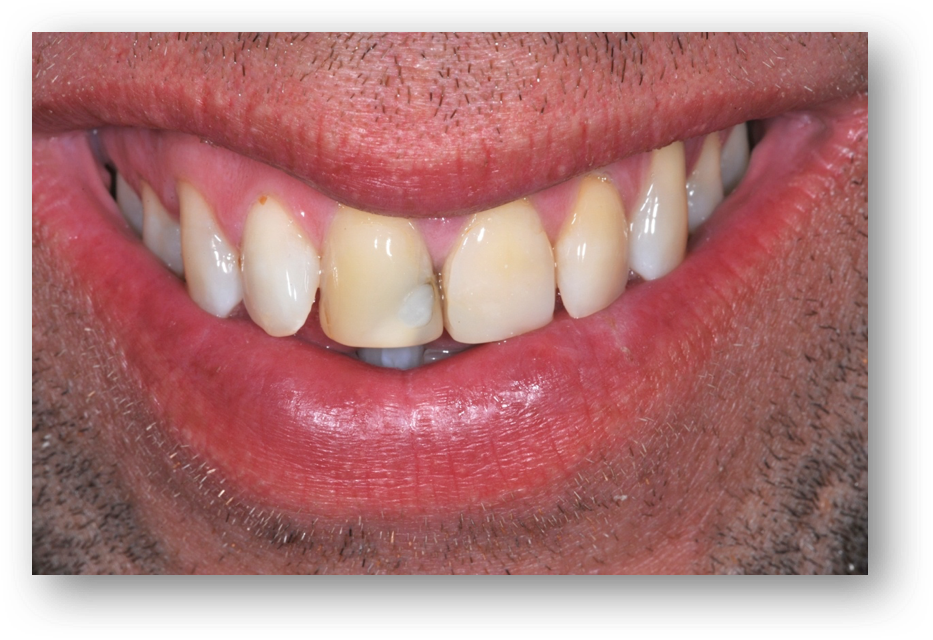
Figure 1
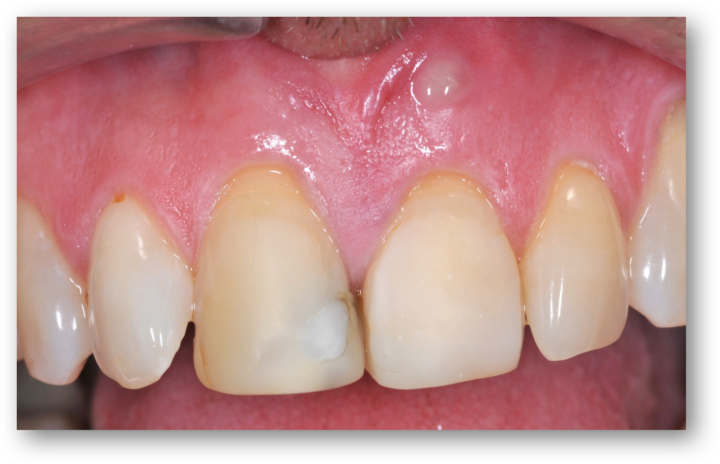
Figure 2
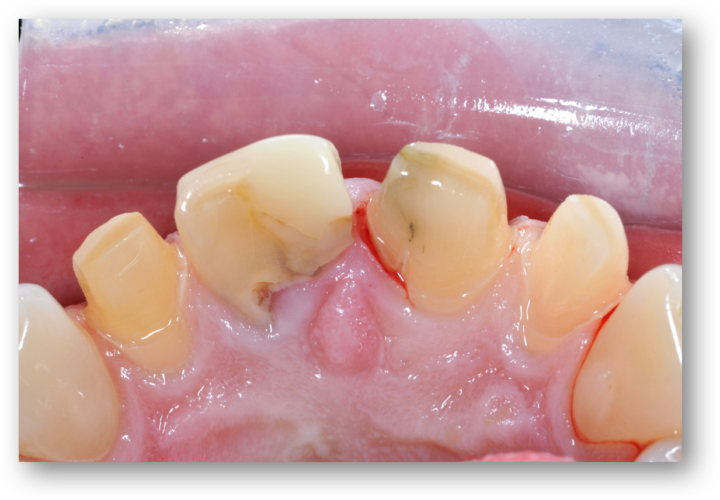
Figure 3

Figure 4
Temporization
As our PAC courses emphasize, planning a case before prepping is critical to overall patient satisfaction and long term success. The temporization or transitional restoration phase is often overlooked in its importance. In this case a matrix was made from a pre-operative model, abutment teeth prepped, and a temporary made. A non supported papilla will begin collapsing almost the second a tooth is extracted unless supported. Slight pressure on the papilla at the extraction appointment is desired.
The temporary in this case was made and composite was used at the pontic site (Fig 5). The material is placed to extend into the extraction site about 3mm and shaped to be 100% convex with an ovoid form (Fig 6). Once a graft material is placed into the extraction site, resorbable collagen tape is placed and the temporary cemented (Fig 7). Slight pressure on the papilla is desired to prevent potential resorption or irritation.
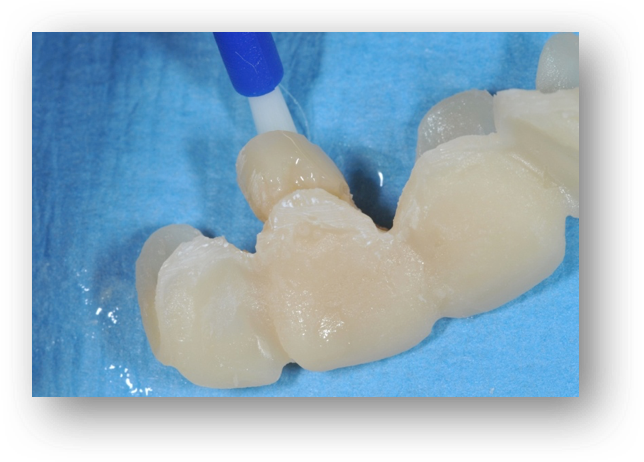
Figure 5
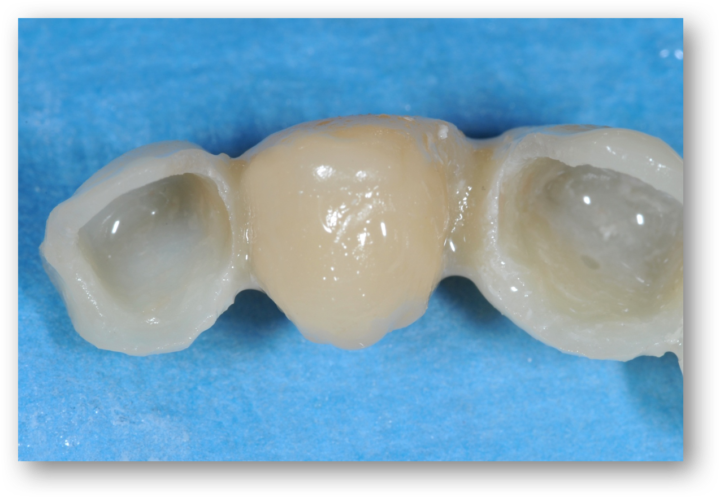
Figure 6
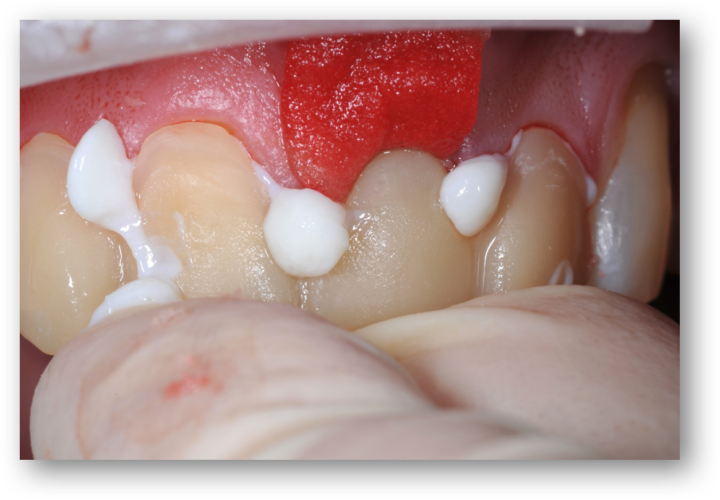
Figure 7
Definitive restorations
The temporary was left in place to hold the graft in place and to support the papilla. At eight weeks the temp was removed, preps refined, and impressions were taken. A zirconia framework bridge with layering porcelain was ordered and tried into place (Fig 8). Positive pressure from the bridge is evidenced by blanching of the tissue and adjusted so that blanching disappears within two minutes of pressure. Support but not excessive pressure with the transitional and final restorations is the goal. How much is too much? Generally, when applying pressure the normal color of blanched tissue should return within two minutes. If not, adjust and recontour.
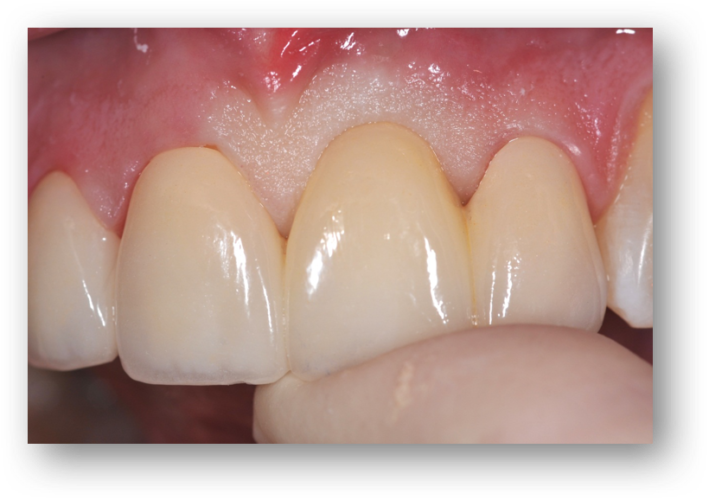
Figure 8
The soft tissue should not be an afterthought (Fig 9). Proper prep design, appropriate materials, and meticulous cementation as taught by the PAC instructors will provide the backbone for successful smile design and great aesthetic dentistry. Just don’t start caring about the soft tissue after it is gone (Fig 10).
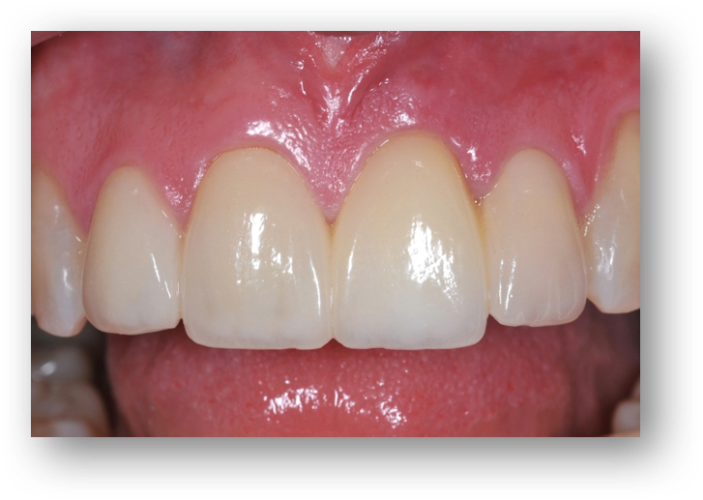
Figure 9
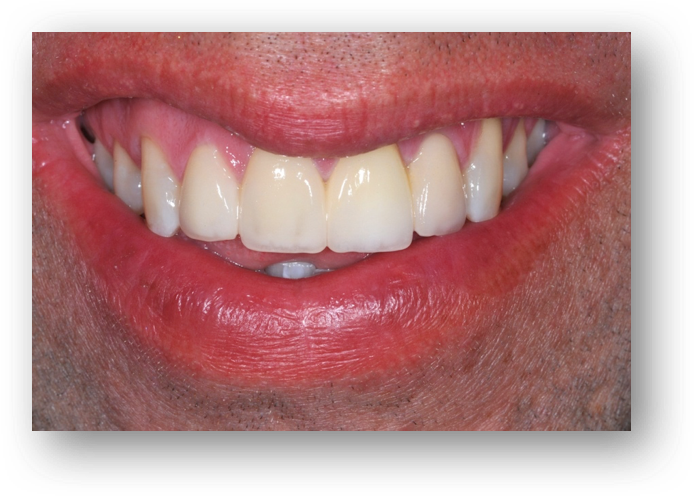
Figure 10
If you have questions about my article or if you would like to send a case, please contact the Pacific Aesthetic Laboratory Group at www.pacificaestheticdentalstudio.com, Gary Vaughn, CDT, CTO (916) 786-6740, or via email [email protected].