
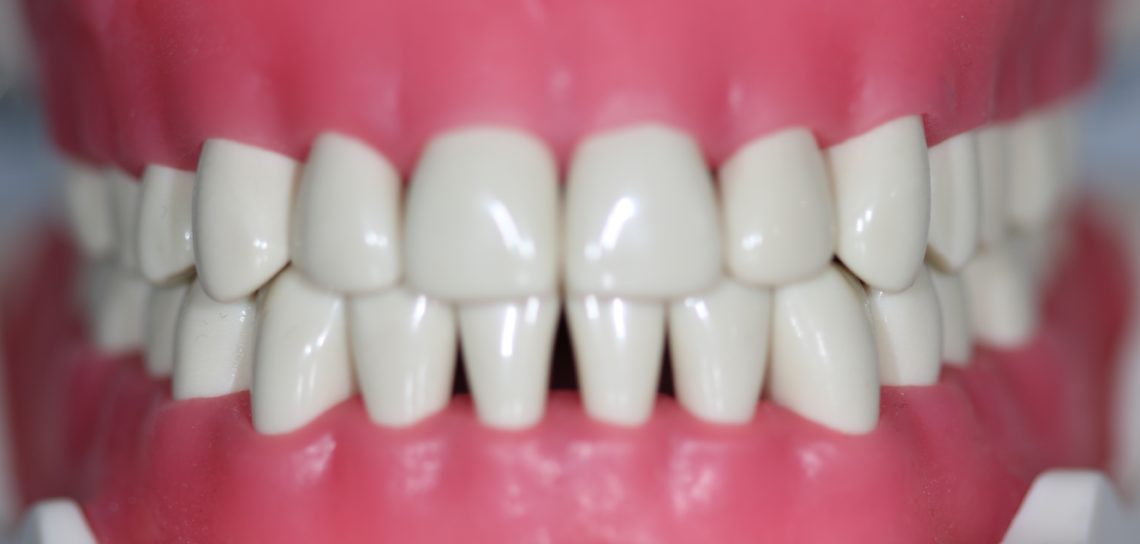
There is clinical photography (Figure 1) which we use to diagnose, to communicate with our laboratory technician, to evaluate ourselves for constant improvement, and to show our patients. This clinically focused photography needs to be done, but it is rather ‘dry’, and more technically driven (proper framing often according to the AACD manual, and proper lighting).
When our patients see images of their teeth with big black holes in them, or gums that bleed it allows them to see that there are problems, acknowledge they exist, and hopefully motivate them to work to resolve the disease. This is showing patients ‘needed’ dentistry to avoid pain and discomfort.
We have often heard that “A picture is worth a thousand words”, but I would add, “Well taken photographs motivate like a thousand words, without any.” Aesthetic dentistry is often elective, so our photography must be different. Our photography has to be a skill which sets us apart, and this is what I am going to try to focus on (pun intended) in this newsletter.
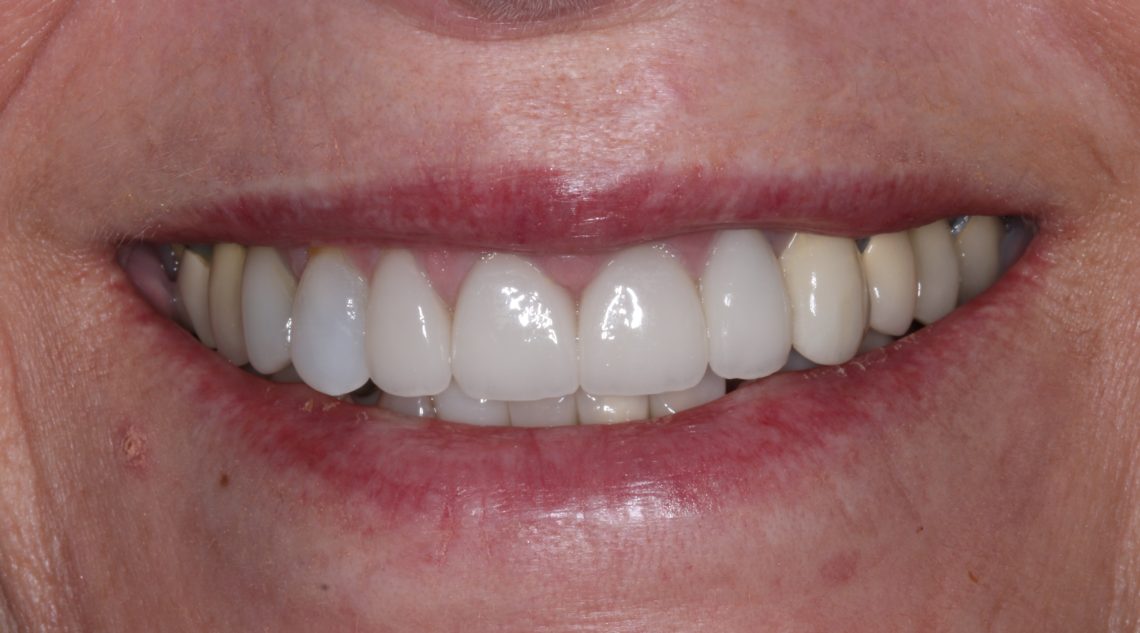
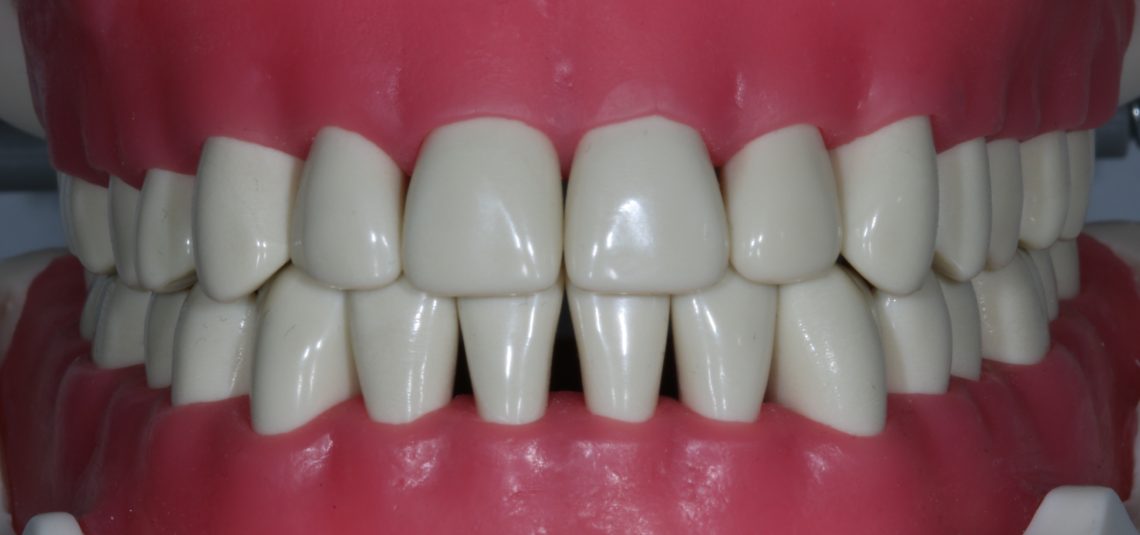
There are photos to demonstrate our clinical skills and artistic passion (Figure 2), they evoke feelings that motivate us and our patients. This is photography that you can use on your social media feeds and give to your patients to build greater value for what you deliver; another positive differentiator. I am going to start with the clinical and move into the motivating. I don’t have much space in this newsletter, so I am going to discuss the key points.
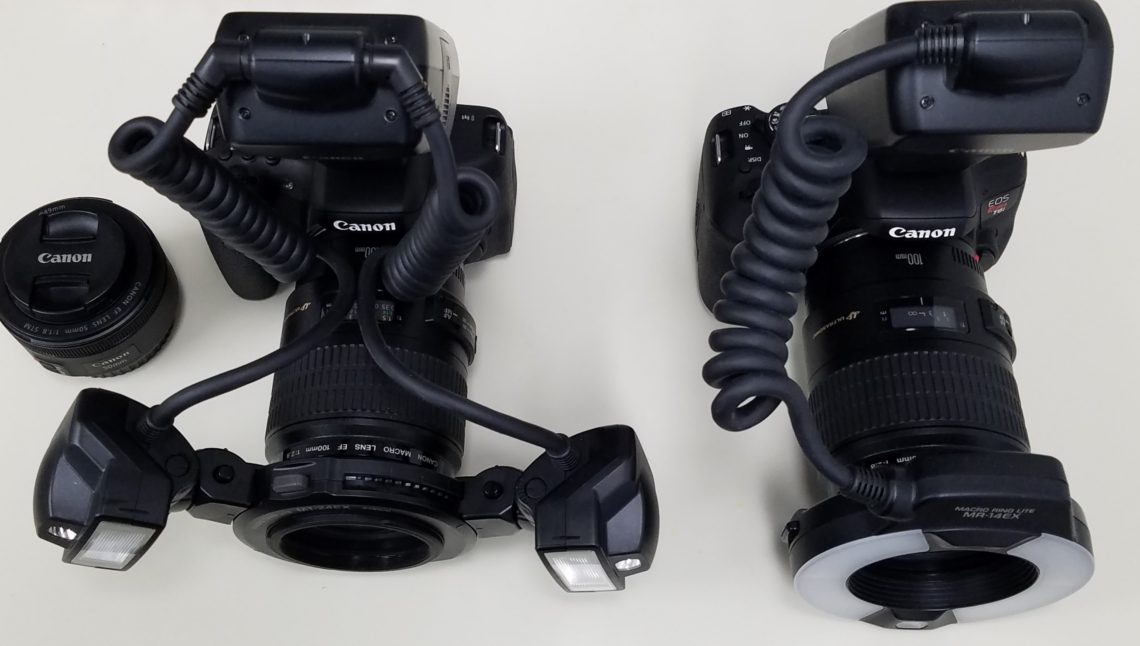
I have decided this year to put more effort into photography in our office. Currently, my office has three Canon Rebel T6i’s, each with a Canon 100 mm lens, one with a dual point flash, one with a ring flash and one for portraits (Figure 3). Why three cameras? So, I don’t have to change the flash units from a ring to a dual point to portrait. I try to remove the obstacles I have to implement new skills. I like the Canon DSLR set-up because I have used Canon cameras for over 40 years. Find the set-up that you like. The little 50 mm lens you see on the far left side is to magnify our image, so we don’t have to crop and enlarge.
One of my most recent photography mentors, Dr. Paulo V. Soares, explained that good photography is about the “Domain of Light”. Where we put the light and the intensity of the light determines the images we create and the information the photographs then lend to the eye (often less light that is still adequate will show more). The camera settings affect the light, so you want to have an appreciation of shutter speed, flash intensity, aperture, ISO, white balance, and temperature.
The shutter speed is expressed in parts of a second indicating the amount of time light is allowed into the camera and is captured on some medium. With dental photography, the object isn’t traveling by us at 100 mph so a shutter speed of about 1/100-1/125th of a second is what I typically use.
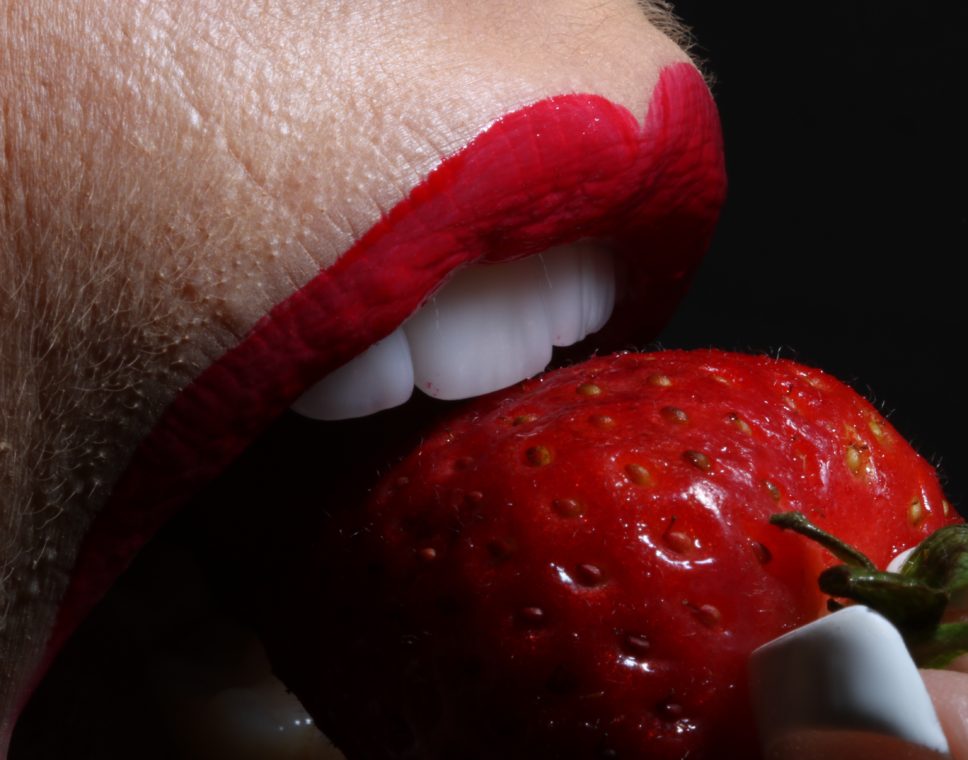
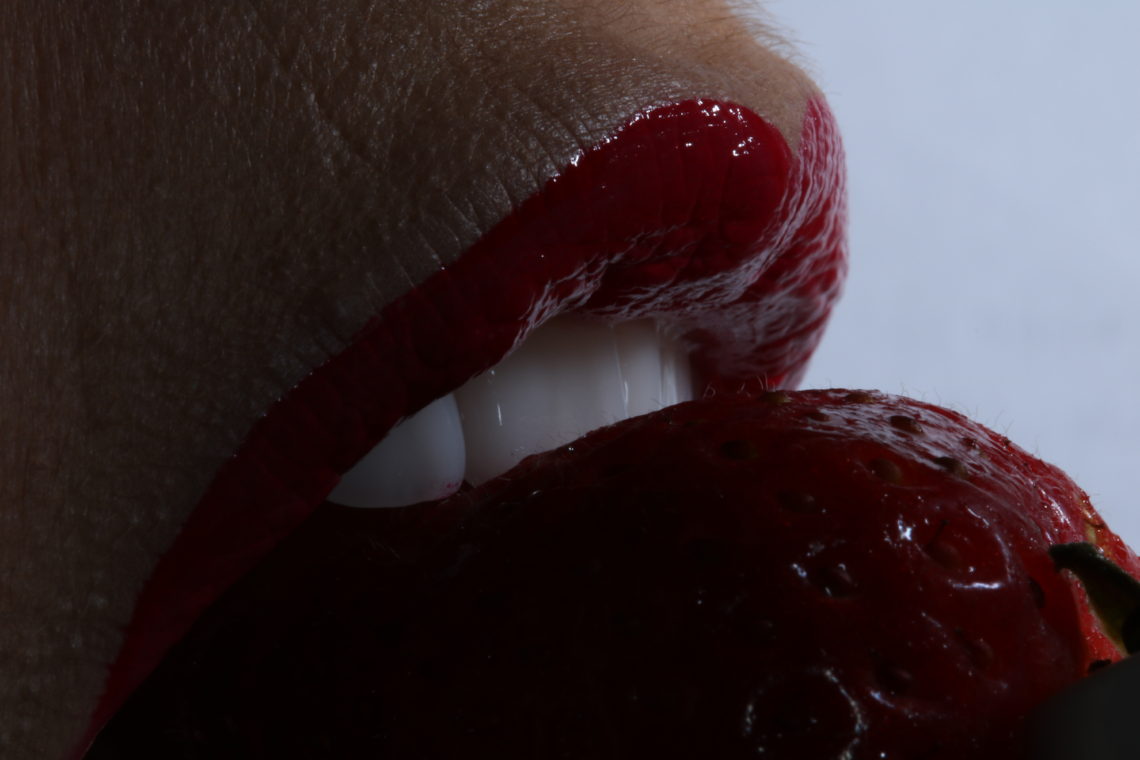
The aperture is how large the opening that allows the light into the camera is when the shutter is activated. This is also referred to as the f-stop. The lower the f-stop number, the more light that is let in, but less depth of focus you have (figure 4). The higher the f-stop number the greater the depth of field is in focus. When you are trying to get a full-arch frontal photo and you want #8 and 14 to be in focus you want the f-stop to be at a higher number (Figure 5). I typically use an f-stop of 29.
The flash setting I used to use was the automatic TTL (Through-the-Lens) setting, but to get different effects I urge you to use the manual setting and try different settings (increasing or decreasing the flash intensity).
When taking photographs, I may adjust my shutter speed, aperture and flash settings, but ISO, white balance and temperature are settings that I set in my camera and then forget.
ISO is how fast the film or sensor reacts to the light. The higher the number the more sensitive the ‘film’ so it requires less light, but the images are grainier, not as clear. I usually set my cameras to an ISO of 100. White balance refers to what the camera calibrates as white and I use a setting of 5200o Kelvin.
The last point is to move your lighting around. With these two photos (Figures 6 and 7), I was using a dual-point flash. I was moving one of the flash units to get different effects without adjusting any other setting. It is fun to try different things so have fun with your photography.
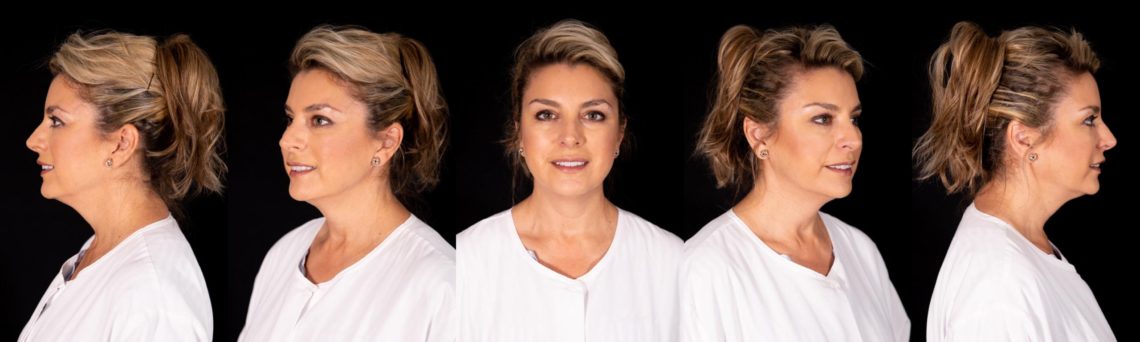
This portrait series of photos (Figure 8) were taken with the same Canon camera and lens set-up as before, but without a flash unit on the lens. These photos were illuminated with LED lighting available on Amazon for less than $200.
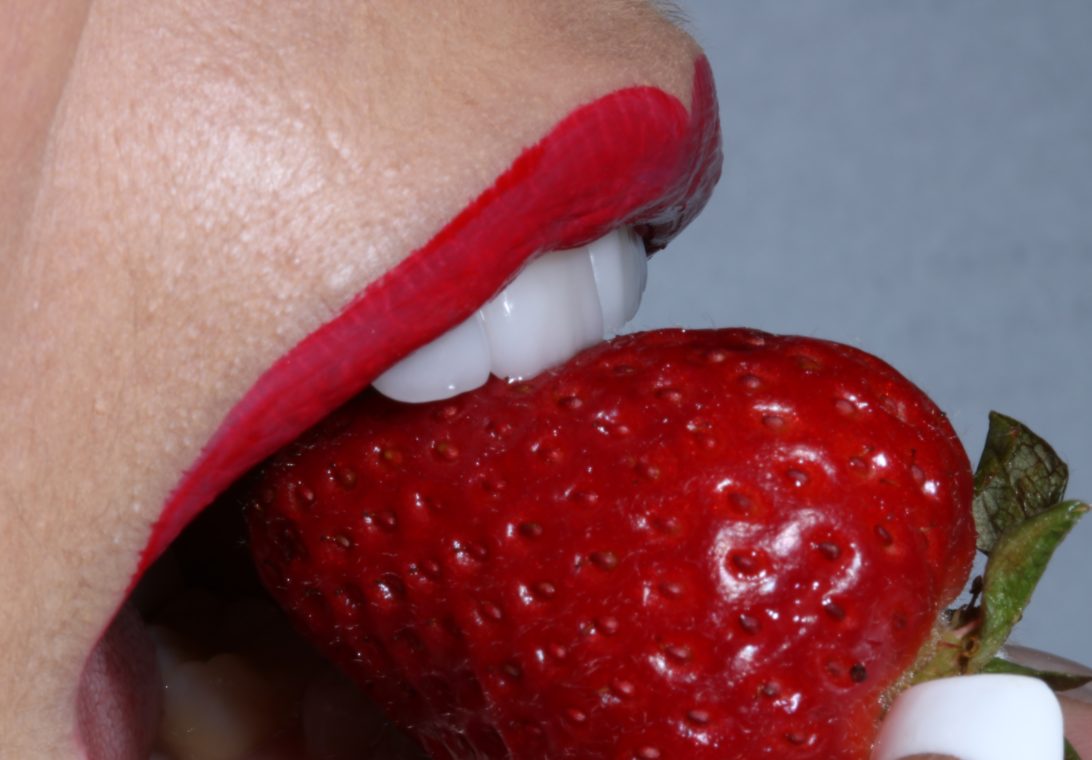
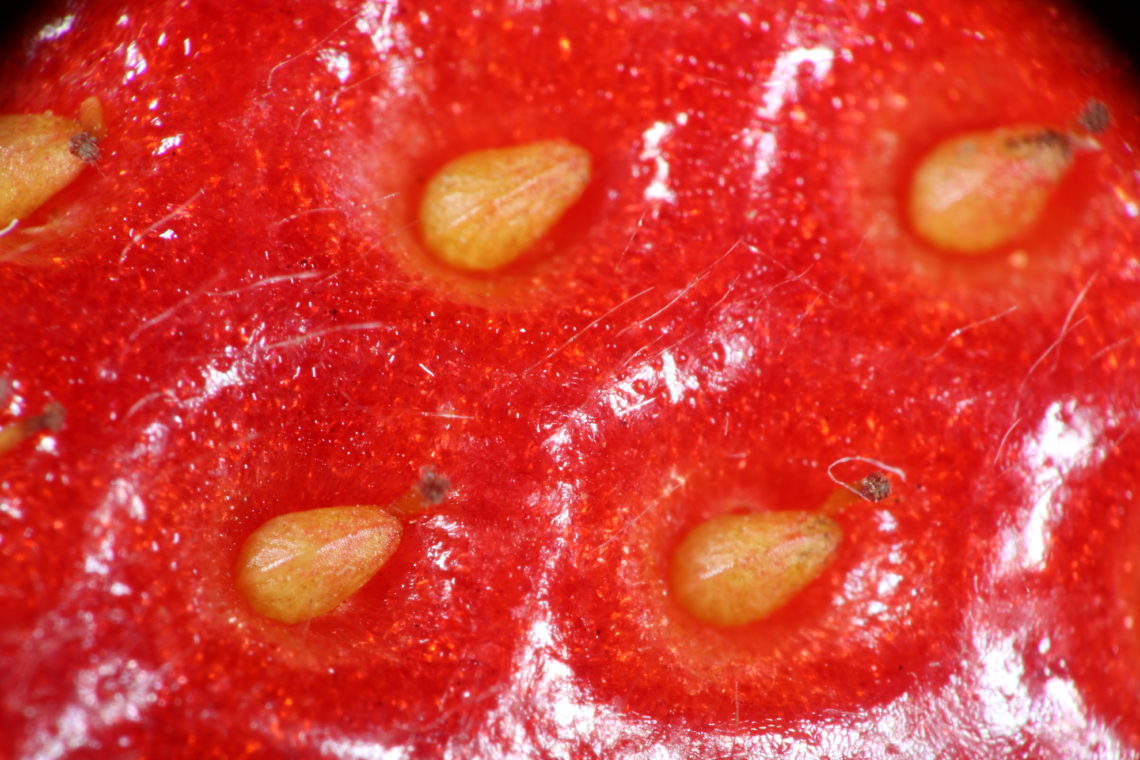
Let me show you what we can do with that 50 mm lens I showed you in the equipment photo (Figure 3). With my 100 mm lens on the camera, I turn the 50 mm lens backward and shot through it. Oriented like that the 50 mm lens becomes a magnifying glass and a whole new world opens to us. Figure 9 shows the view of strawberries through the 100 mm lens, and Figure 10 is an example of taking the photograph of the strawberry with the 50 mm lens added showing the giant seeds. This is not an image that was cropped and enlarged, what you see filled the entire viewfinder frame. We have all the resolution in this photo so if we do end up cropping what we need and enlarging the remaining image we would not lose any significant image quality.

How do you learn more? Dr. Matt Comfort and Dr. Bryan Judd teach photography to their Northern California Academy of Cosmetic Dentistry (NCACD) chapter members and Dr. Todd Franklin covers photography in his PAC Aesthetic courses so if you have not already, I would strongly encourage you to attend their training and learn more about dental photography.
I hope you can see the importance of DSLR cameras in my office. My photography allows me to evaluate my work, the materials and techniques I use, and keeps me on the journey of improving my skills every day. It helps me capture material to lecture with and share the stories. And when we talk about doing aesthetic dentistry our photography gives us a way again to speak to our patients, clarify expectations, and communicate to the laboratory. But we, of the PAC, need to be sure it motivates our patients and sets us apart. So, break away from doing just the traditional clinical shots and have some fun, play with the lighting and grow your aesthetic practice in 2019. I hope you can take a few of the tips here and make it an unbelievable year.
If you have questions about my article or if you would like to send a case, please contact the Pacific Aesthetic Laboratory Group at www.pacificaestheticdentalstudio.com, Gary Vaughn, CDT, CTO (916) 786-6740, or via email [email protected].