
Several months ago, an article I wrote appeared in our PAC TEC newsletter about the importance of diagnostic wax-ups. I am not going to readdress what I wrote that article. Rather I intend to share a concept we happened upon several years ago in our diagnostic department. I do not claim this to be my idea. In fact, I am not certain where it came from, but I have seen it work so well I thought I should share it. For those of you who are aware of this information and may have even become very adept with using it, use this as a refresher.
How often have you wanted to prep a full mouth case or even a single full arch that needed to be opened vertically because of excessive wear or attrition? Or perhaps you are prepping for prosthetic convenience to correct a cross bite in an older patient or even to develop some space for a patient who is over closed?
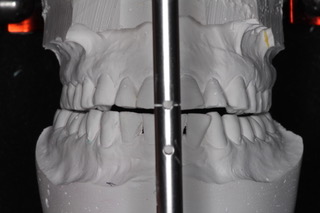
Regardless of whether you are working with a deprogrammed bite or a case mounted in centric or simply an articulated case in the habitual position, once you open the articulator, set the pin to the desired new vertical position. (Figure 1) Use dental putty, (any kind works) and fashion a “patty” by hand. Carefully lay it over the entire occlusal surface of the mandibular arch. Then close the articulator to the new pin setting, capturing the maxillae imprinted completely in the topside of the putty. Trim off the excess both around the exterior of the arch as well as any excess that would preclude the patient from biting back into the patty possibly due to missing teeth sites or a diastema (that would grab hold of the putty). (Figure 2)
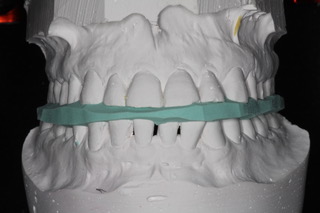
Now you have a template to refer to which will allow you to maintain the desired new vertical position while you proceed to prep the case one quadrant at a time. As you prep the quadrant, simply backfill that area of the bite patty with bite registration material and place it back in the mouth on the unprepared teeth.
While the patient bites down into position the preparations will impress the newly expressed bite registration material. Allow the material to set and remove. Resume prepping the other posterior quadrant, and repeat the same procedure, capturing the new preps in the bite registration on the other side of the arch.
This process works whether you are doing one or both arches. With this bite patty that you have now modified to capture the preps, you have maintained a bite record of the new vertical and an accurate bite registration for the laboratory to use to mount the models.
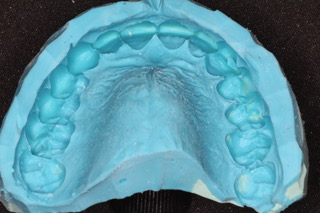
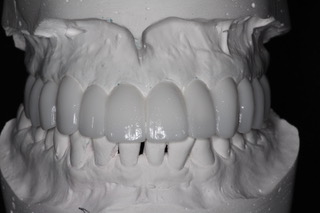
You are now ready to get your final impressions and use the temporary matrix (Figure 3) made from the diagnostic wax-up that was waxed to the new vertical which was established with the pin setting on the articulator. (Figure 4) When this procedure is strictly followed, occlusal adjustments, if any, are at a minimum.
At this holiday season, Corr Dental Designs, the Pacific Aesthetic Laboratory Group, and the PAC extend our very best wishes to you, your team, and your family! Thank you for your continued support! May we all enjoy a Happy and Prosperous New Year!
If you have questions about my article or if you would like to send a case, please contact the Pacific Aesthetic Laboratory Group at www.pacificaestheticdentalstudio.com, Gary Vaughn, CDT, CTO, (888) 461-3331, or via email gvaughn@thePAC.org.
