Dr. Samir Ayoub
A few months back, a patient was referred to me by a dentist who had previously taken our hands-on course and who has done numerous anterior smile designs. The various complexities of this case, as you will see, presented a challenge he felt uncomfortable pursuing. I feel the end result we accomplished was excellent. The patient was overwhelmed with her final smile makeover.
The full face smile showed a severe left to right maxillary cant, obvious facial symmetry discrepancies, smile arch and lower lip issues as well as a severe discoloration and other tooth position discrepancies. Note the teeth and smile were a distraction to an otherwise attractive face.
As we viewed a closer look of her E smile, which forces her lips into full smile position, we began to see in more detail the complications presented and a closer look into her dental smile design needs (eg: cuspids in lateral position, midline diastema, gingival asymmetry and new zenith locations, edge to edge bite, buccal corridors, gradation, major color change, etc.) (Fig. 1).
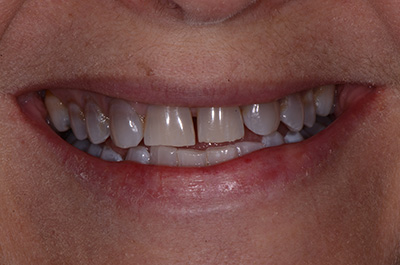
Figure 1
And finally, the retracted view photograph showed what the problems were that we had to overcome with our smile design, and the extent of the preparation design needed to accomplish an attractive end result (Fig. 2).
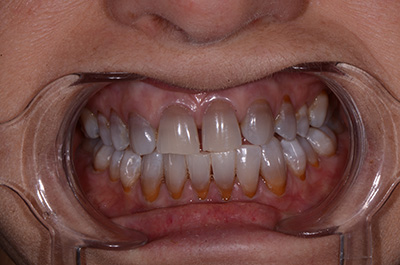
Figure 2
Using our smile design principles you will note the following: length of centrals and incisal edge position (move facial); smile needed to be fuller all around, bringing buccal corridors out to the facial position of the first molars; the gradation effect would be better achieved by bringing the right side up and the left side down at the buccal cusp tips to try to level and/or improve the severe maxillary cant; gingival laser recontouring was necessary mainly on the right side; and the zenith positions needed corrections as we converted the canine teeth in the #7 & 10 position to laterals at the same time converting the first bicuspids to cuspids, the second bicuspids to first, and the mesial of the molars #3 and #14 converted to appear as second bicuspids #4 and #13.
Additionally, the bulge in the gingival third facial required flattening. Teeth 7 & 10 (cuspids) needed extra reduction of the gingival neck of the teeth as well as the mesial and distal to allow the laboratory room to make a natural appearing lateral.
All the while as this was going on through proper, well-directed preparation designs, we focused on closing the diastema and generally moving the right side mesially (Fig. 3).
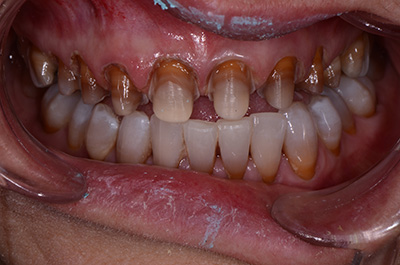
Figure 3
During preparation of the teeth, the excessive discoloration became more apparent and the decision was made to prep heavier, creating well-defined margins and heavier facial reductions. This would allow the laboratory to do full wax, cut back, then layer porcelain to create nice color with depth and translucence. The e.max (Ivoclar) restorations could be pressed in a more opaque ingot, to mask the dark tooth color (Fig. 4 & 5).

Figure 4
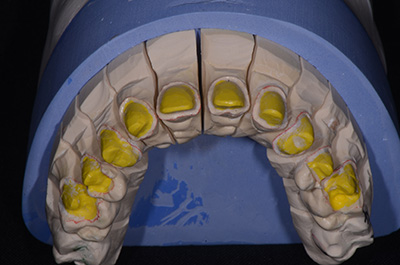
Figure 5
My technique to strategically and reliably get the appropriate reduction is to make a pre-temp temporary, removing it from the mouth and measuring the exact thickness. The teeth can then be further prepped in all aspects (facial, mesial, distal, and lingual) to assure precise and adequate tooth reduction.
Using the facial prep guide allows the dentist to visualize facial reduction as well as mesial-distal reduction and tooth positioning (Fig. 6).
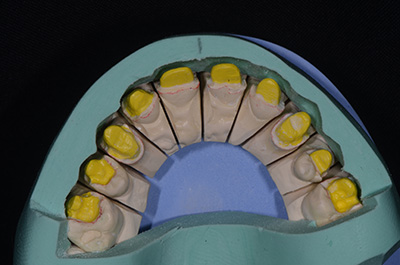
Figure 6
When we checked the temporaries five days later and chose the final desired shade we determined our efforts had been accomplished. We provided the laboratory what was needed with smile design, prep design, temporization and photographs to create the beautiful restorations to exact specifications (Fig. 7, 8, & 9).
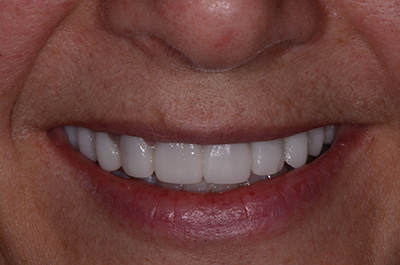
Figure 7
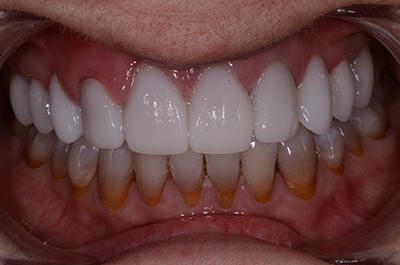
Figure 8
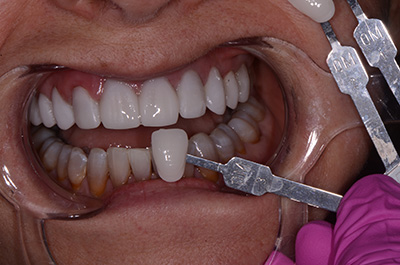
Figure 9
The extensive thoughtful process we have meticulously gone through and the precise preparation of the teeth and gingival architecture has its rewards upon seating the exquisite restorations and achieving results that far exceeded the patient’s expectations (Fig. 10, 11, & 12).
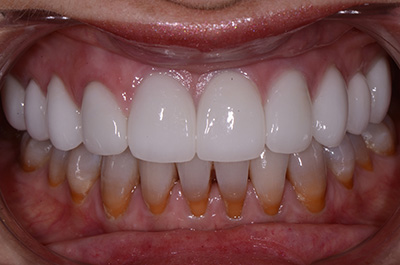
Figure 10
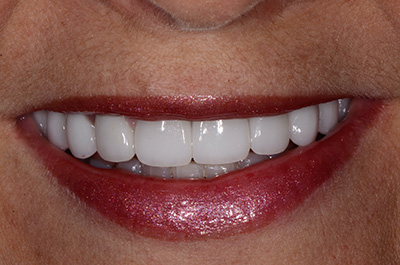
Figure 11
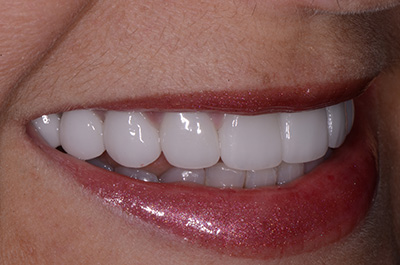
Figure 12
The patient will never understand the detail of thought and execution by the dentist and laboratory, but our reward comes from knowing we did our best. Our reward is a happy and appreciative smiling patient that has waited for many years to change her smile and improve her life.
My thanks to Corr Dental Designs, the Pacific Aesthetic Laboratory Group, and the very talented group of artisans responsible for creating this case.
If you have questions about my article or if you would like to send a case, please contact the Pacific Aesthetic Laboratory Group at www.pacificaestheticdentalstudio.com, Gary Vaughn, CDT, CTO (916) 786-6740, or via email gvaughn@thePAC.org.
