
Dr. Todd Franklin
If you have spent any time with the PAC, either at a live patient hands-on course or have been fortunate to place beautiful restorations from Gary Vaughn and his team then you have seen great work. We’ve all seen patients in our office who we’d love to get our hands on and provide them with a beautiful new smile. Many of these patients have already invested in a new smile but unfortunately, the results fell short. How do we approach and plant seeds? Asking a few leading questions may be your technique. Sometimes they bring up the question. Maybe use your next team meeting as a Q&A session of how you can get to do more of these cases.
So let me introduce you to Ashley: a lovely young lady, new to the office, and interested in keeping things healthy. We inquired regarding the age of her previous veneers, what the reason was for getting them originally, how did she enjoy the process, and how she felt about the final results. For us, we are more about asking questions than we are in giving statements. I like this approach in that it is genuine and gives us honest feedback from the patient.
Over the course of a few visits, she would ask various questions regarding my thoughts on changes I would recommend. She did mention that initially when the doctor placed the veneers they were too big and bulky so he recontoured the anterior six teeth. There was no mention of any diagnostic wax-up, smile preview, or smile check. These steps would be critical for a beautiful result. We reviewed previous cases, talked about materials, color, and shapes. We recommended ortho as a possible place to start to correct some malocclusion. Finally, she was of the mindset that she wanted to do a revision of her case.
As we always do, we reviewed all of the smile design principles for her case. She wanted to brighten the color, soften the look, and correct some angles of her teeth. I immediately saw the midline shift and urged we look at ortho first. She had already been down that road and wasn’t interested. Looking at the macro view there were items I wanted to pay particular attention to including a midline shift, midline cant, maxillary cant, deficient buccal corridors with recession, and asymmetrical lower lip. Now the fun began.
We proceeded without a wax-up because I wanted to create temporaries by hand since there were many variables to consider. Removing the old veneers was uneventful and identified all the areas of leakage. Many times, what you see radiographically isn’t what is present in the mouth. Needless to say, we were all happy that we had decided to redo her veneers. We prepared and modified the preparations as needed trying to be conservative. The anteriors resulted in restorations that were between a true veneer and full coverage. We needed to provide her proper cuspid guidance since there was posterior occlusion on the buccal inclines of the bicuspids resulting in the recession. Centric/MIP occlusion was good so we maintained that position and didn’t need to modify and vertical dimensions. We provided all the typical records, two working impressions, CR/MIP bite, a bite stick, and lots of photos (Figure 1). In hindsight, I would have also taken a facebow record so we could verify all the cants presented in the case.
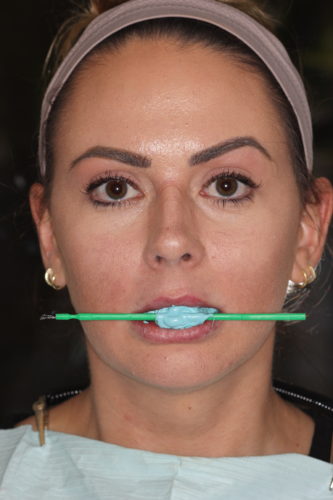
Figure 1: Prep Bite Stick
We handcrafted the temporaries by using a PVS impression of her prior temps, cutting those back and layering in the contours we wanted (Figure 2). We took many more photos, an impression, and a bite stick of the temporaries. We scheduled her for a smile check to make sure we were all happy with her trial smile. Small tweaks that we wanted were noted and the case was sent to the laboratory.

Figure 2: Temporaries
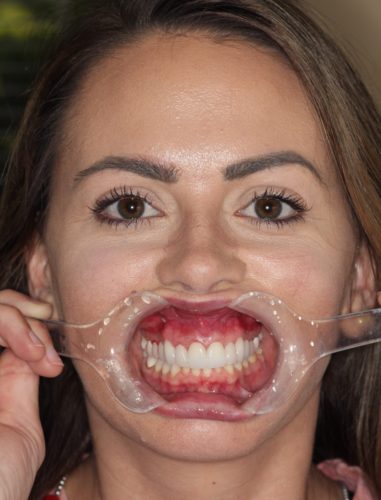
Figure 3: Porcelain Try-in
On cementation day we were able to get everything tried in and the fit verified (Figure 3). We noticed a cant was still evident in the anterior four restorations. Happy with the cuspids and posteriors we cemented those and took a new imp impression of the anterior four preps so that any minor mesial-distal fit from cementation would be identified. We also took a pickup impression of the anterior four so that we could have the laboratory correct the cant that was still present. We used the pickup impression to create new temps, corrected the cant, and took a new temp impression of the corrected temps. Back to the laboratory for the final edition of her new smile. We cemented the last four restorations and she ended up with a beautiful new smile (Figure 4 and 5).
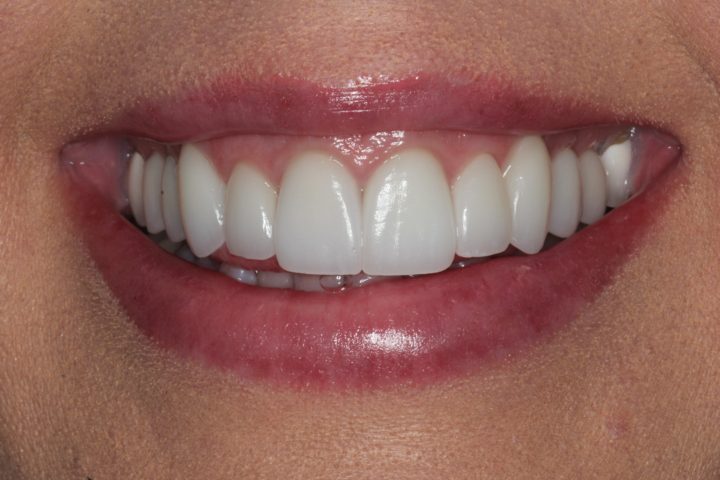
Figure 4: Final Smile
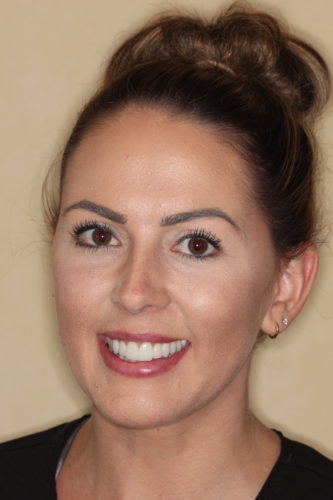
Figure 5: Final Smile
This was a fun case to do and provided many design challenges beyond the norm. Ashley was a fantastic patient knowing she would get a great result once we were finished. Things came up that made us think outside the box but not complicate the process. We were happy with the results.
If you have questions about my article or if you would like to send a case, please contact the Pacific Aesthetic Laboratory Group at www.pacificaestheticdentalstudio.com, Gary Vaughn, CDT, CTO, (888) 461-3331, or via email [email protected].