
Dr. Samir Ayoub
When your granddaughter asks you where your teeth are and why you don’t smile, you realize you may have a problem. I recently completed an aesthetic and reconstruction case of a patient with an extremely worn dentition. The patient stated that his daughter and granddaughter had been commenting on his lack of a smile with no teeth showing. He had been aware of his worn teeth and lack of anterior teeth display for several years but now he wanted to do something about it. He had been preparing financially for a reconstruction and was eager to get it done. He was also concerned that his father had severe bruxism issues and had also worn his teeth down to the gums.
Upon the initial examination, I advised him that he had excessive teeth wear on his anterior teeth and that he would need a full mouth reconstruction. I told him we would have to restore all of his teeth, open the bite/vertical dimension, and provide major laser gingival treatment. I also advised him that he may need osseous, periodontal crown lengthening as well (Figures 1-2).
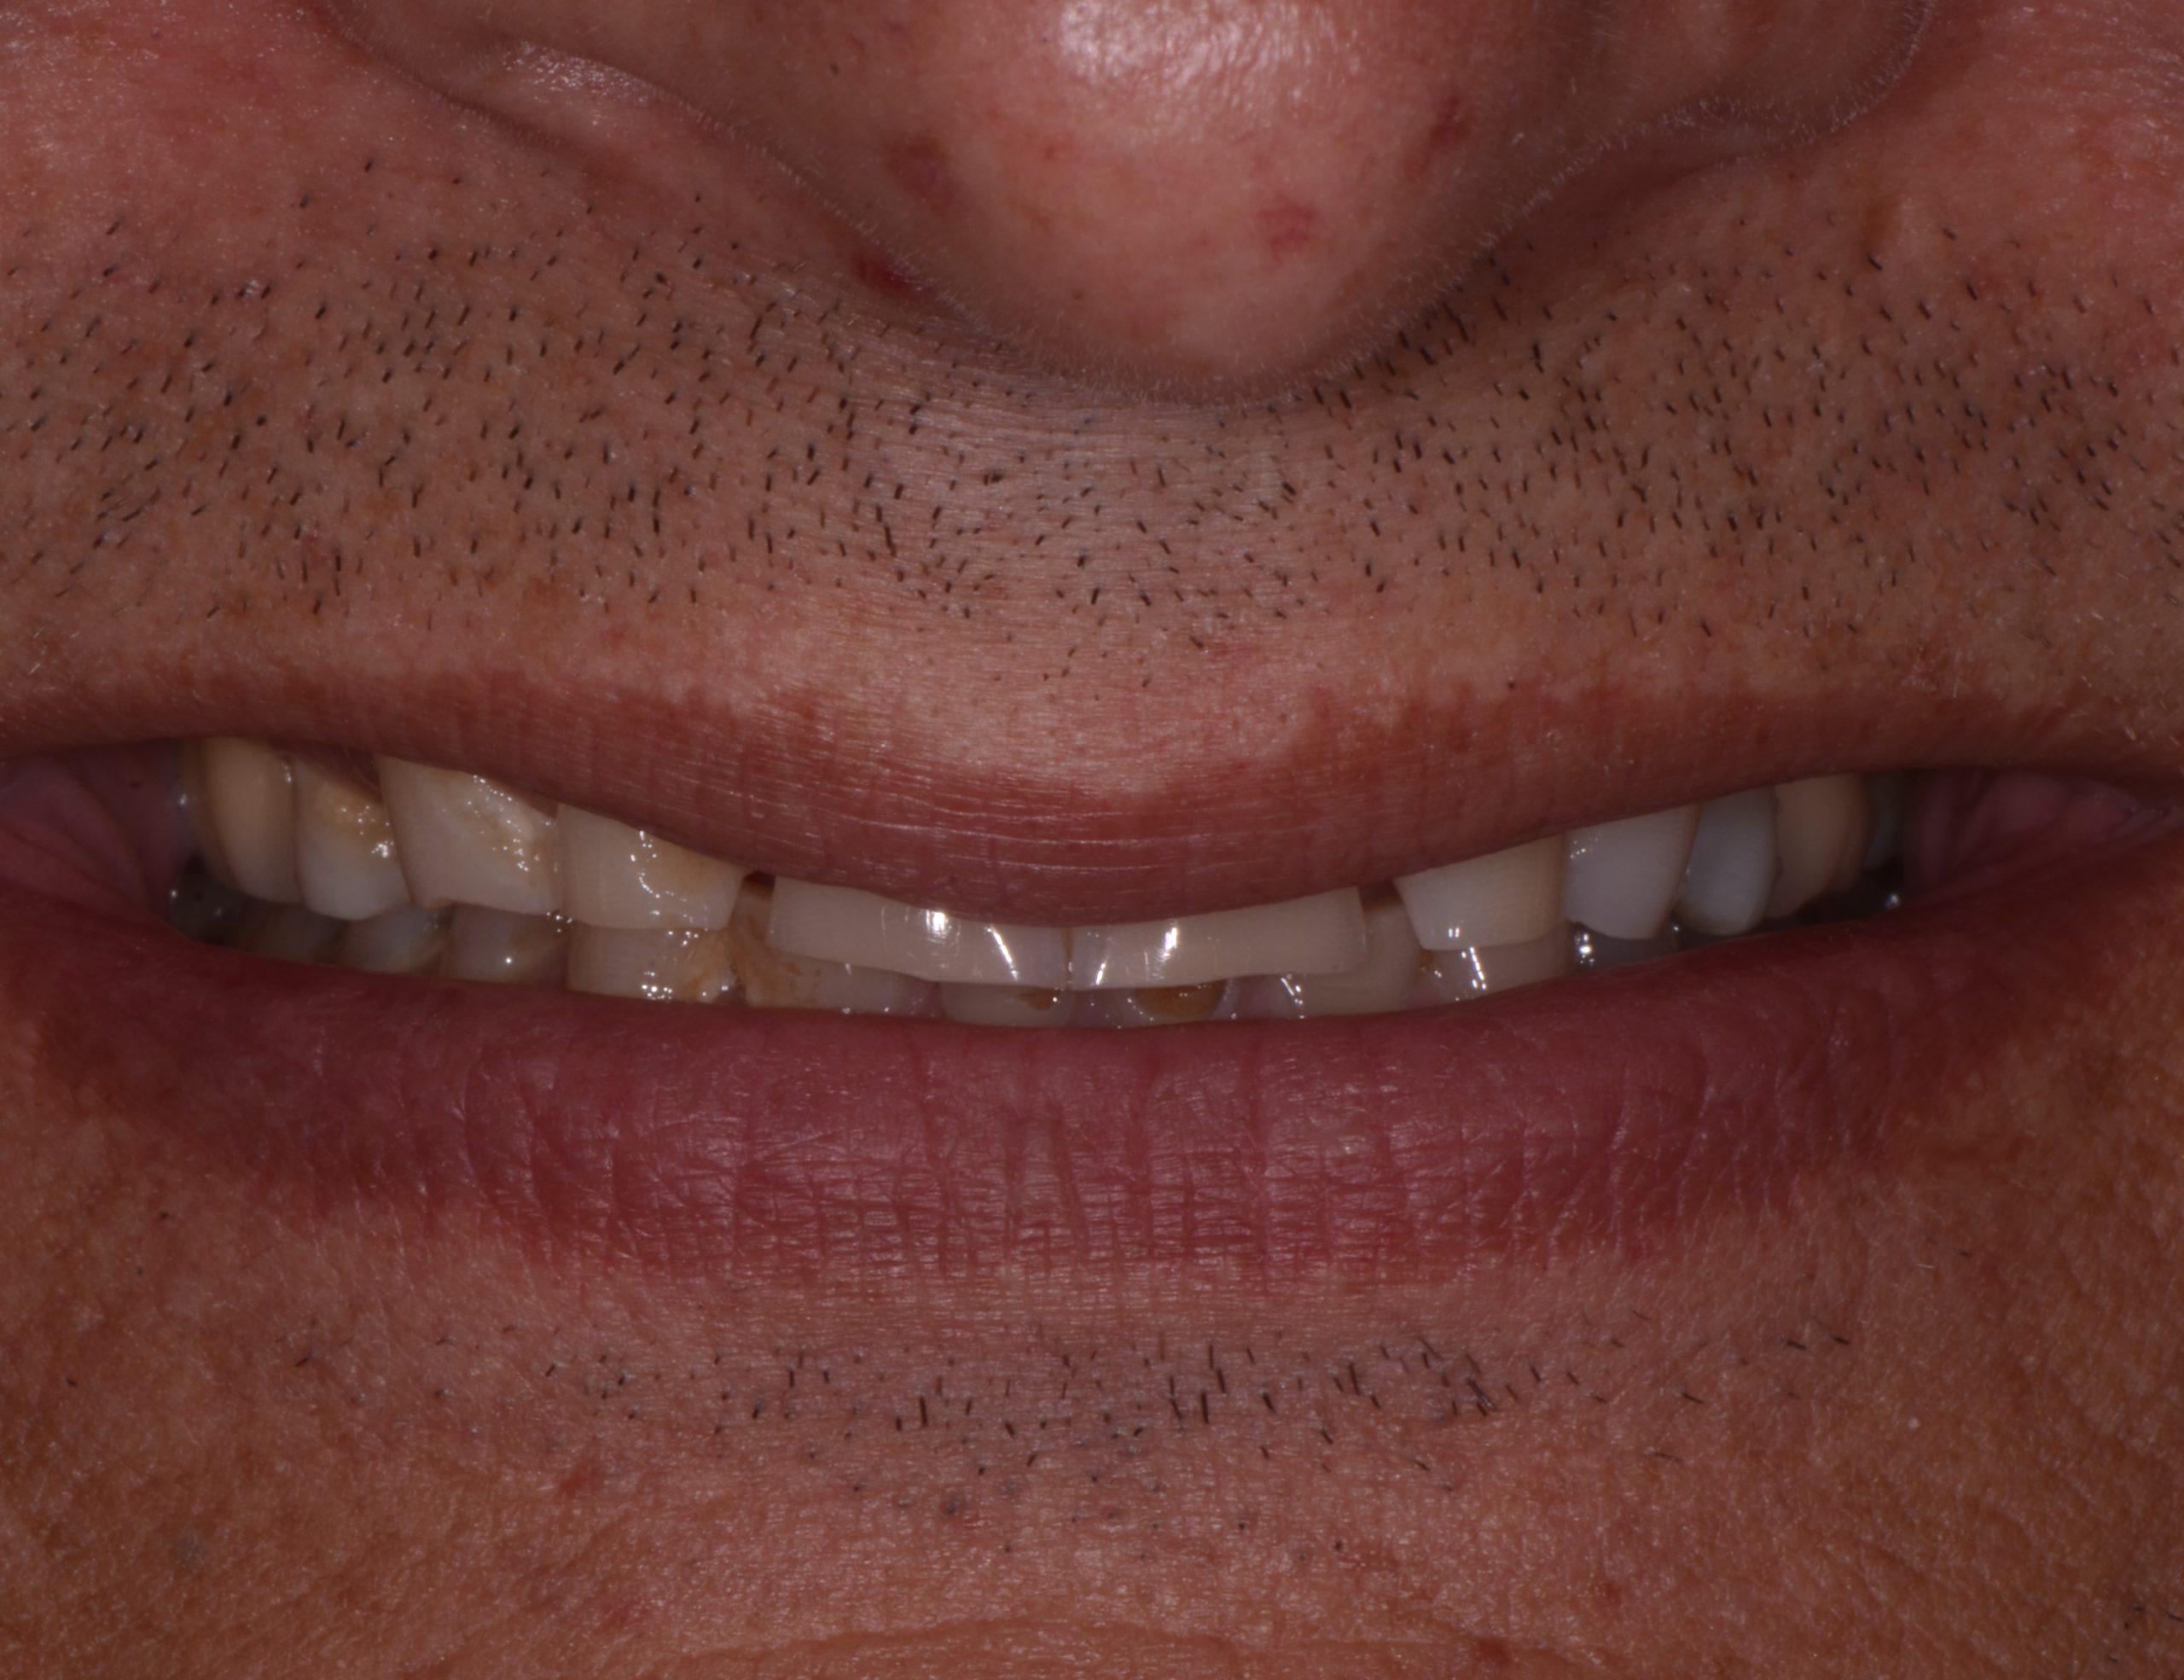
Figure 1
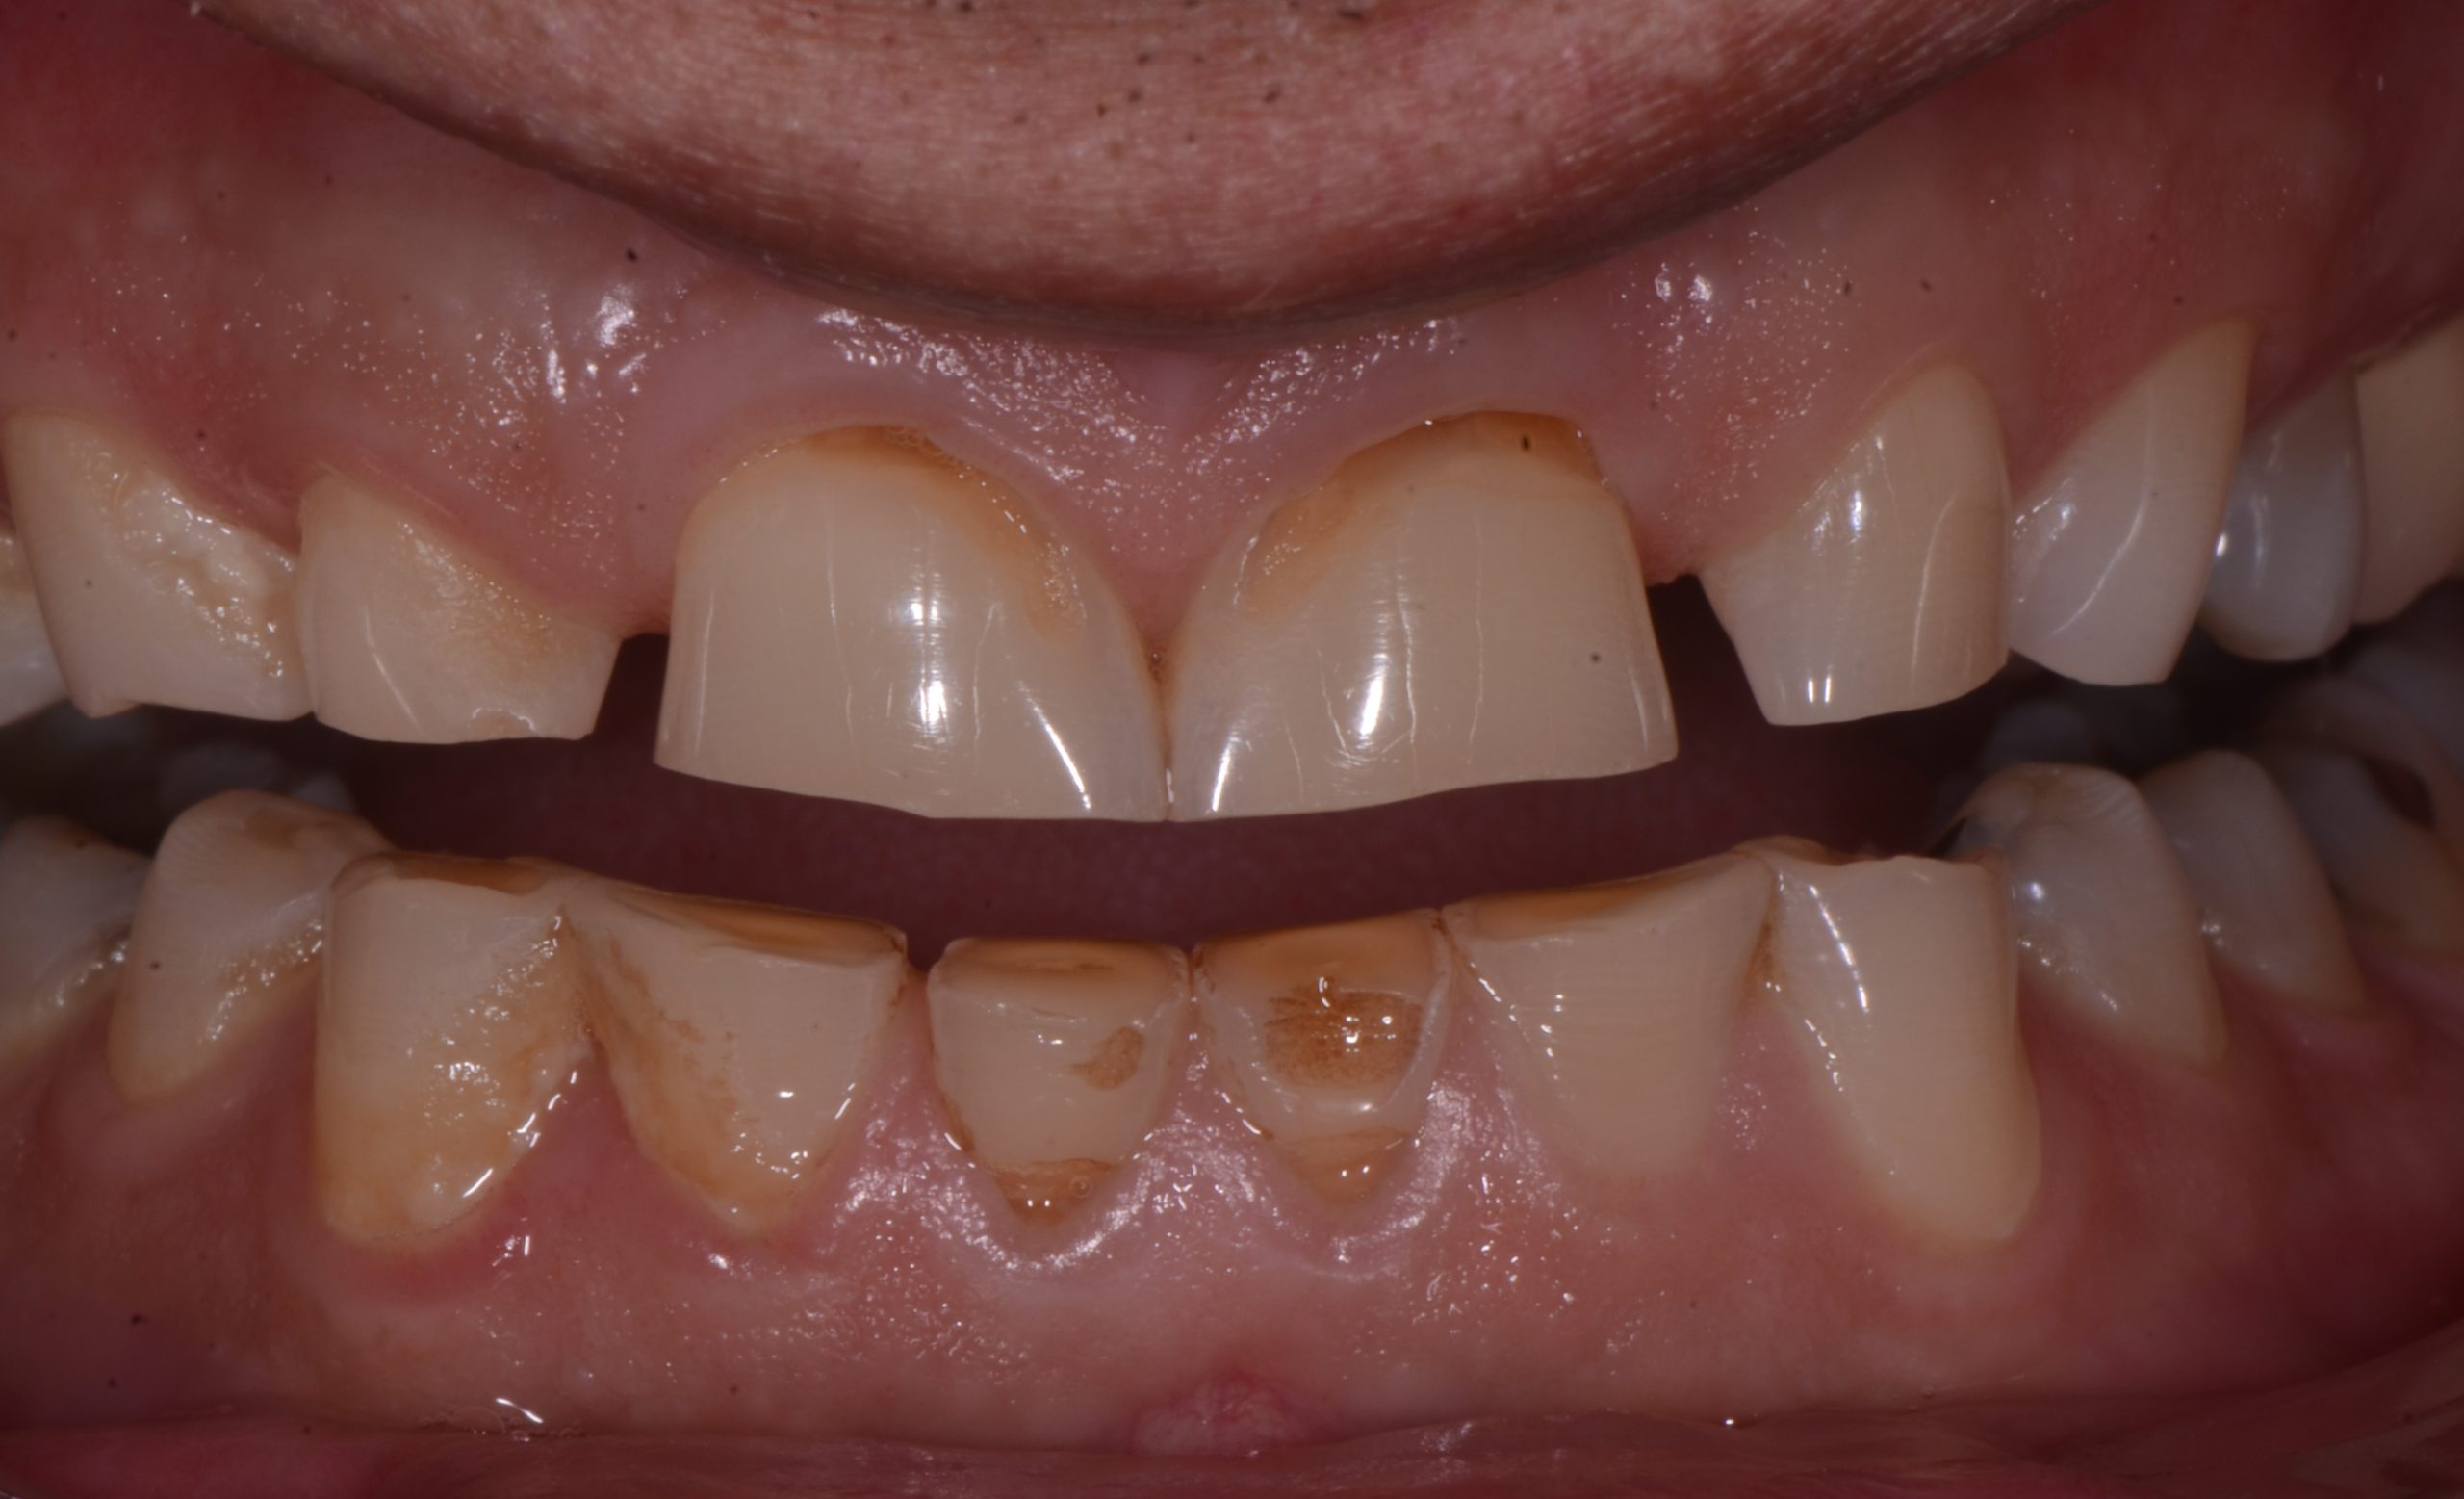
Figure 2
At his first clinical appointment, his teeth were analyzed, his gingival tissue health was evaluated for laser contouring and tissue crown lengthening, and he had a TMJ evaluation (Figures 3-5).
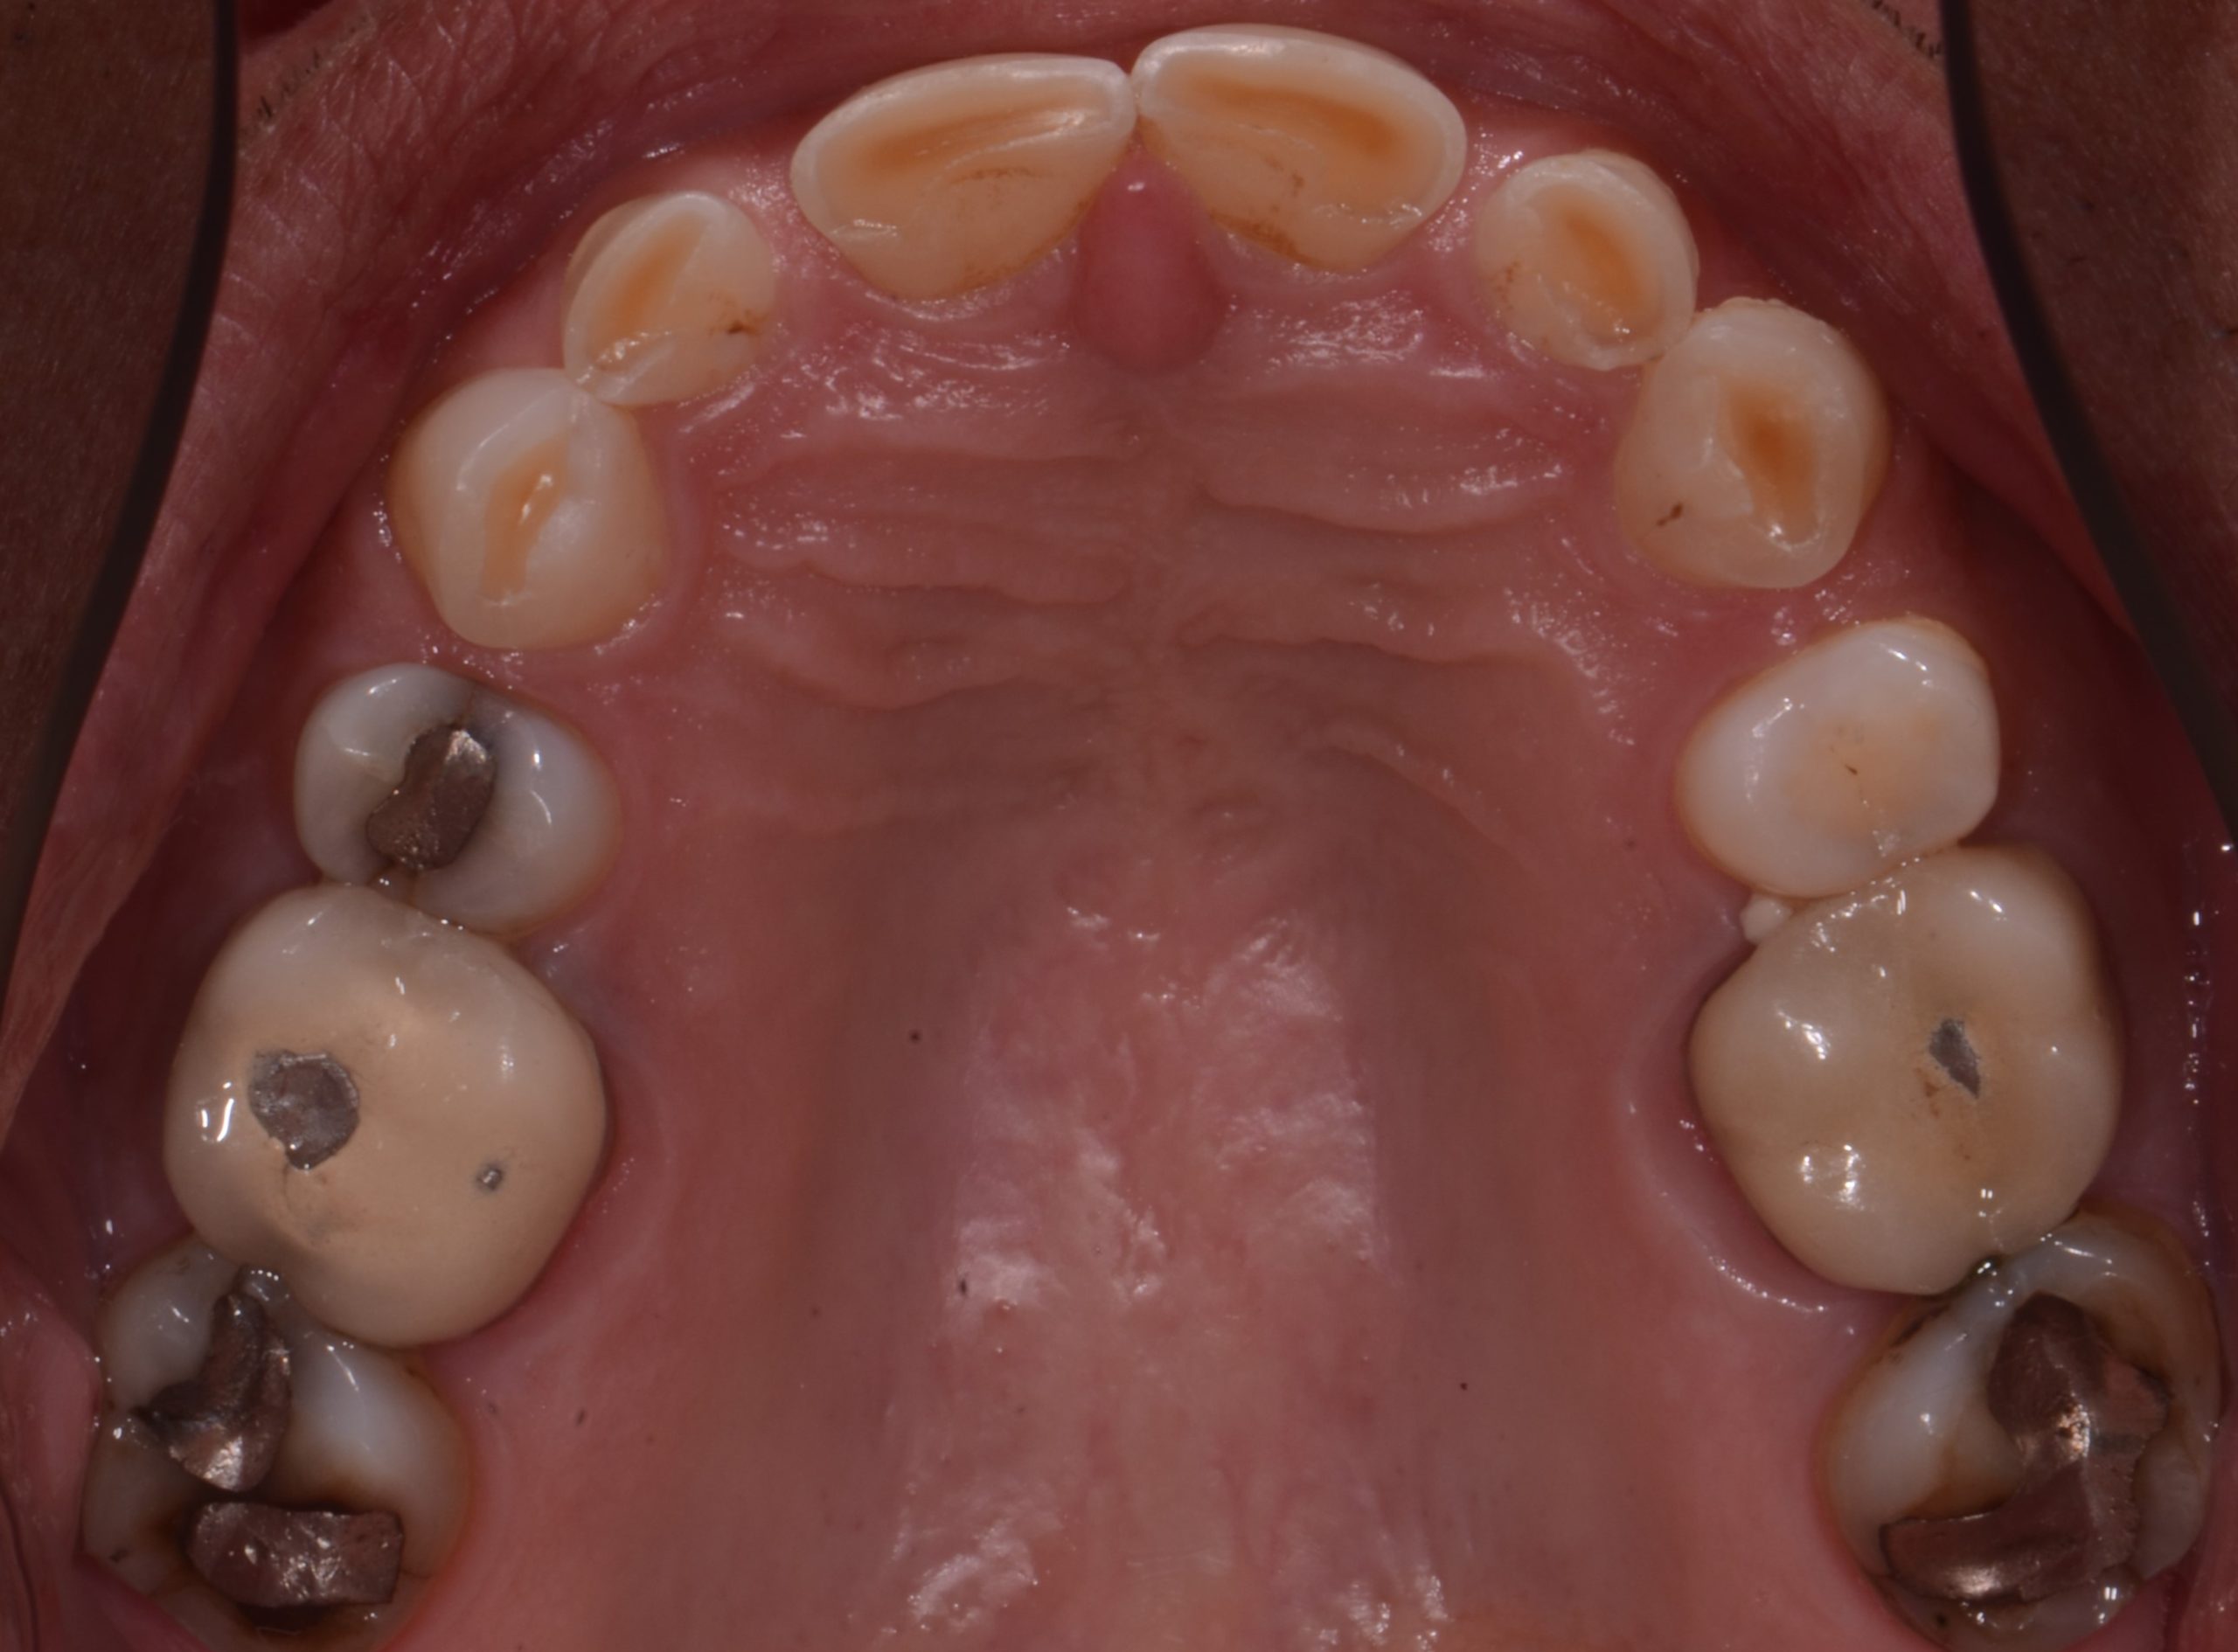
Figure 3
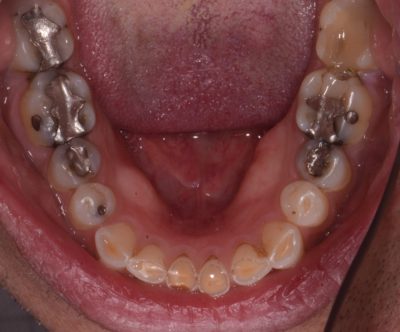
Figure 4
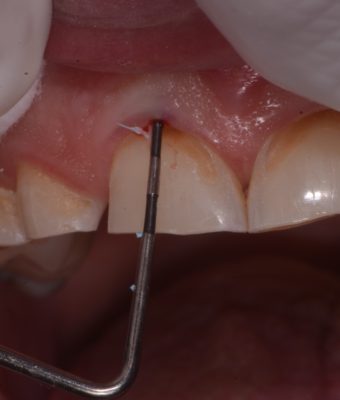
Figure 5
Photographs, impressions, and face-bow were taken. I made a composite anterior bite jig to open the vertical dimension, position his jaw in centric relation, and take the bite registration in the appropriate vertical opening to accommodate the restoration needs for aesthetics, function, and material strength. After repeated checks of the anterior jig and the ease in opening and closing in the CR position, I proceeded to take first a right side bite registration, then a left side, repeating his opening and closing consistently and smoothly in the CR position. Removing the anterior composite jig, but keeping the right and left bites, I took the anterior bite registration and again checked for a consistent even and smooth closure in CR. Now the dental laboratory could mount the case on a hinge axis and open the bite, more if needed for aesthetic design or material requirements (Figures 6-7).
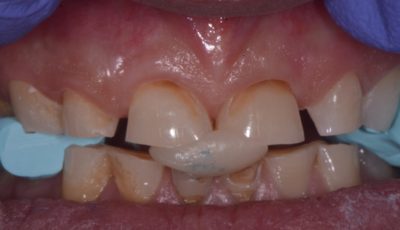
Figure 6
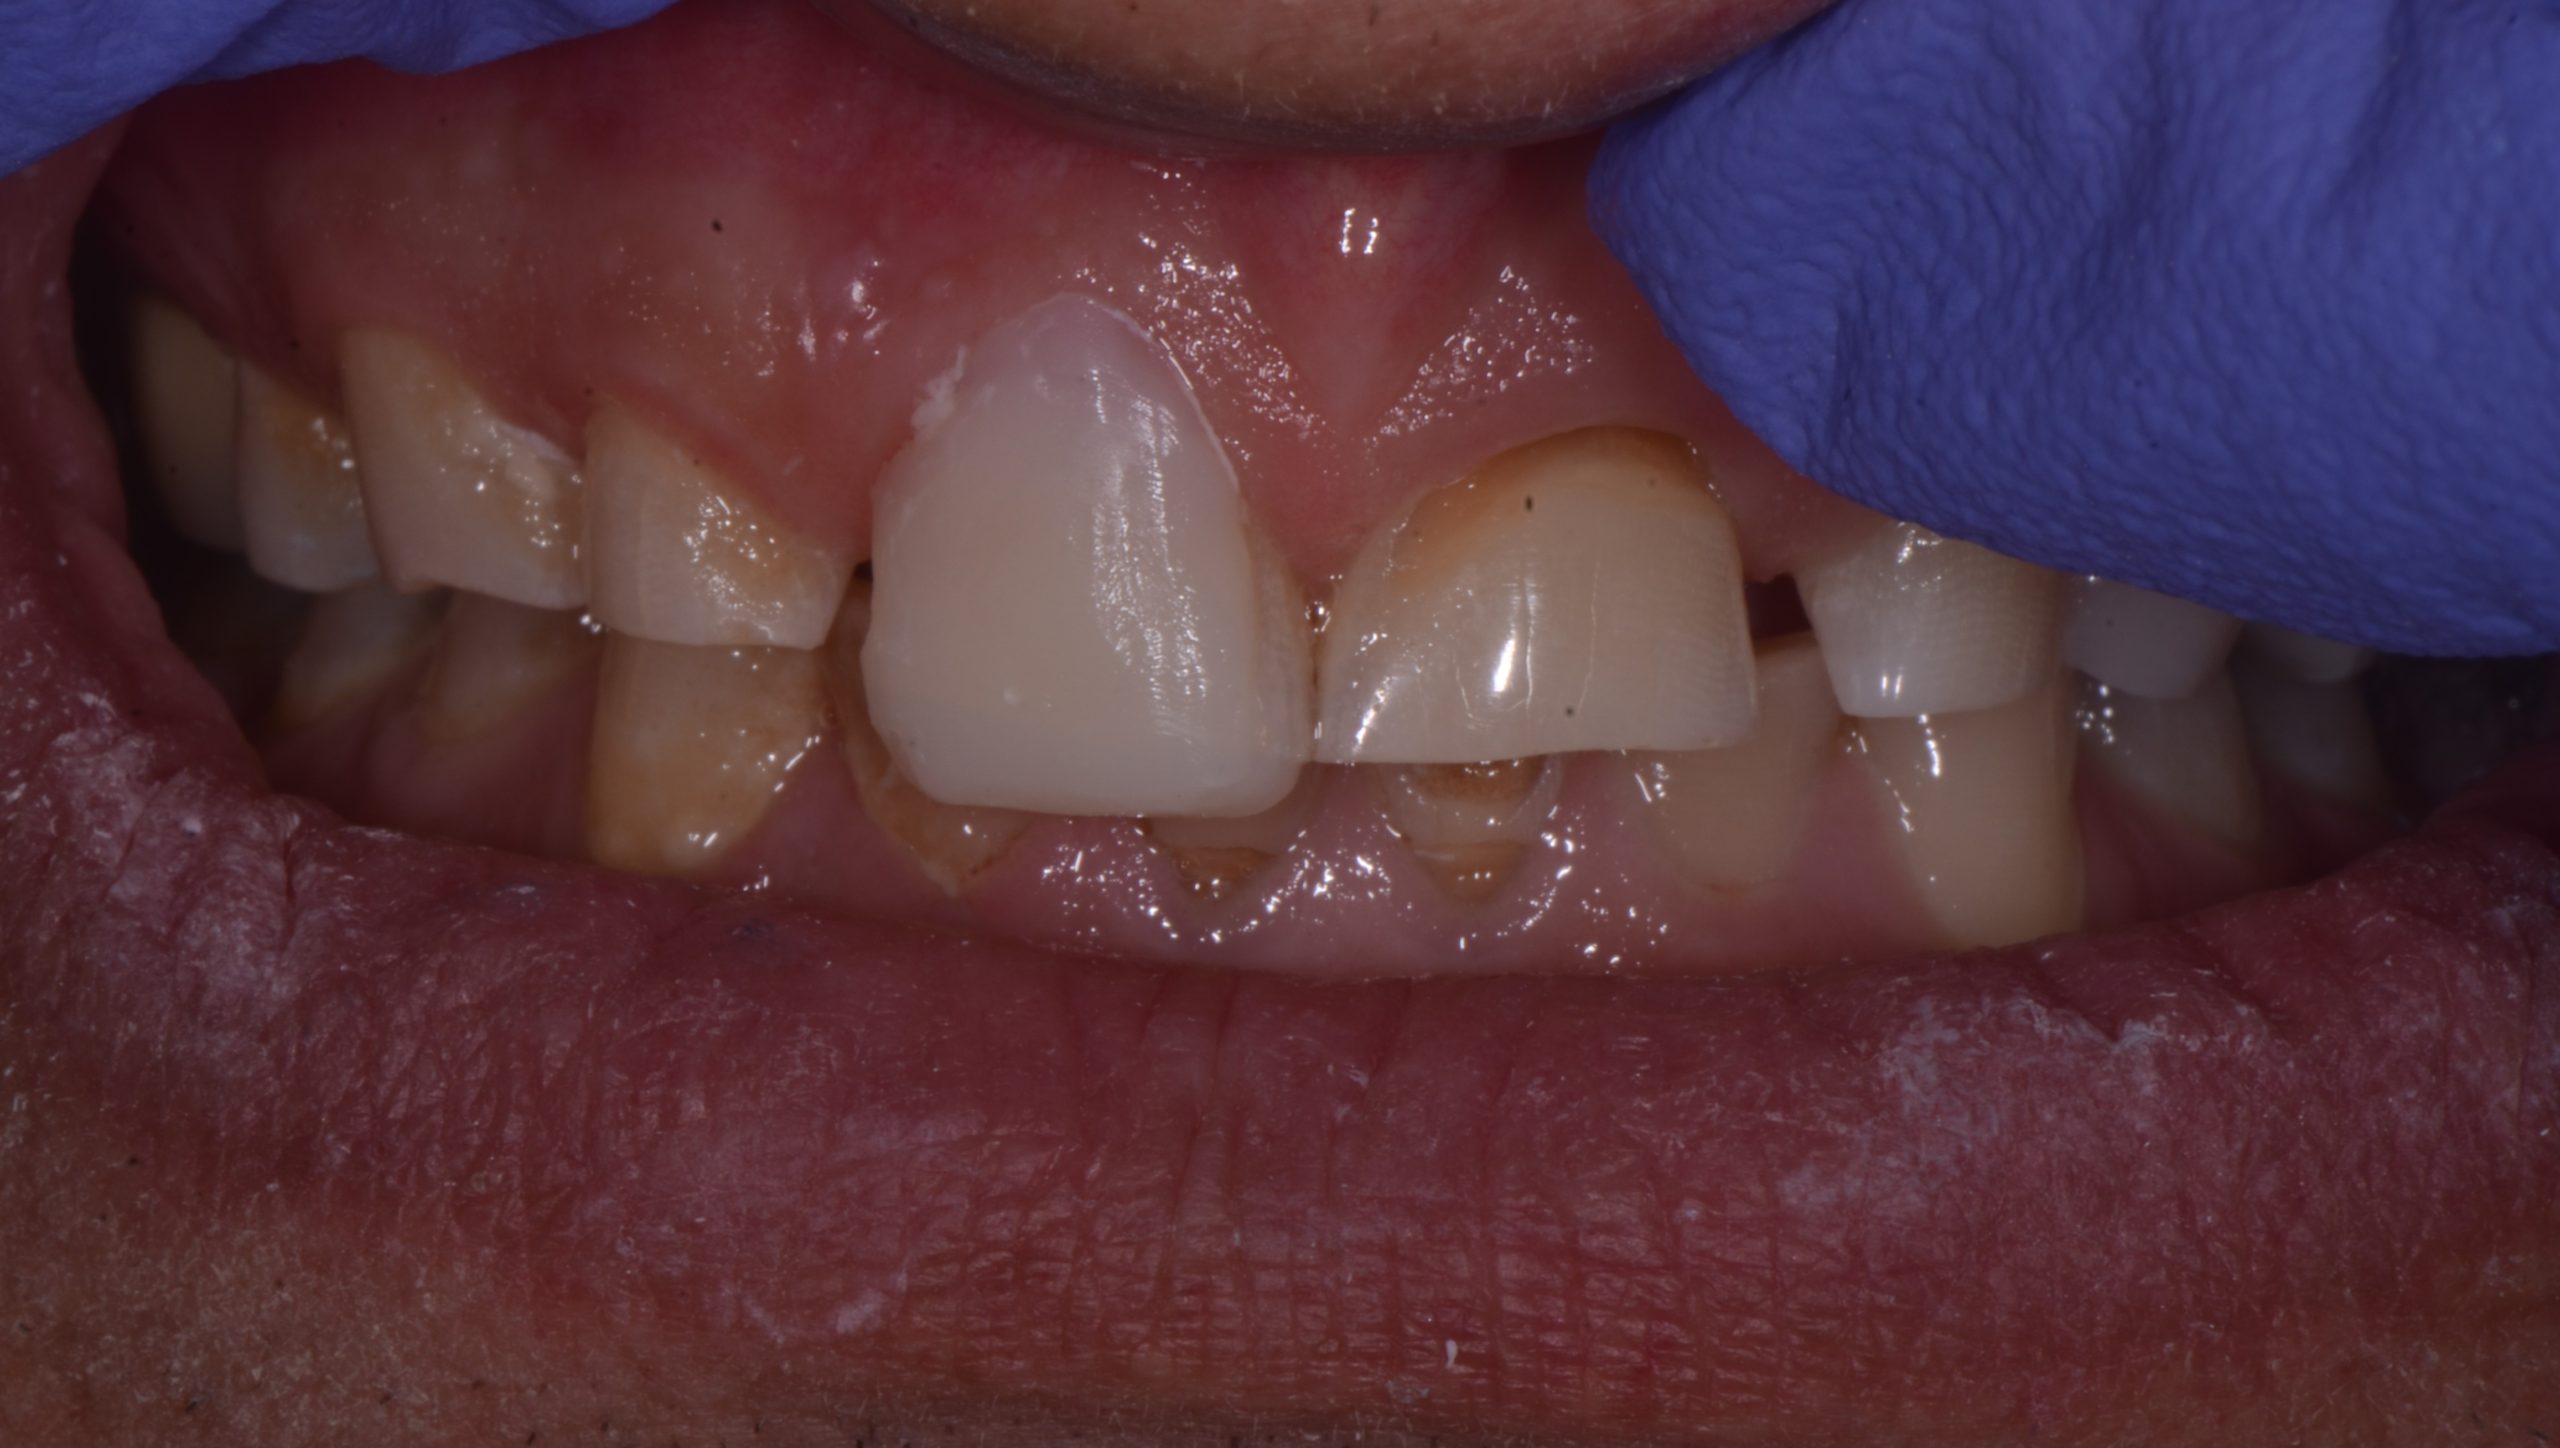
Figure 7
The extra efforts in determining the proper vertical opening and capturing a repeatable CR bite registration paid big dividends in the final results attained. Corr Dental Designs/Pacific Aesthetic Laboratory Group precisely mounted the case and produced a perfect diagnostic wax-up, prep guides, incisal guides, and temporary matrices.
In full mouth cases when the vertical is opened and full coverage is required, I also have the laboratory make clear stents from the wax-up to aid in occlusal reduction and full visualization of all the surfaces to be prepped (Figures 8-10).

Figure 8
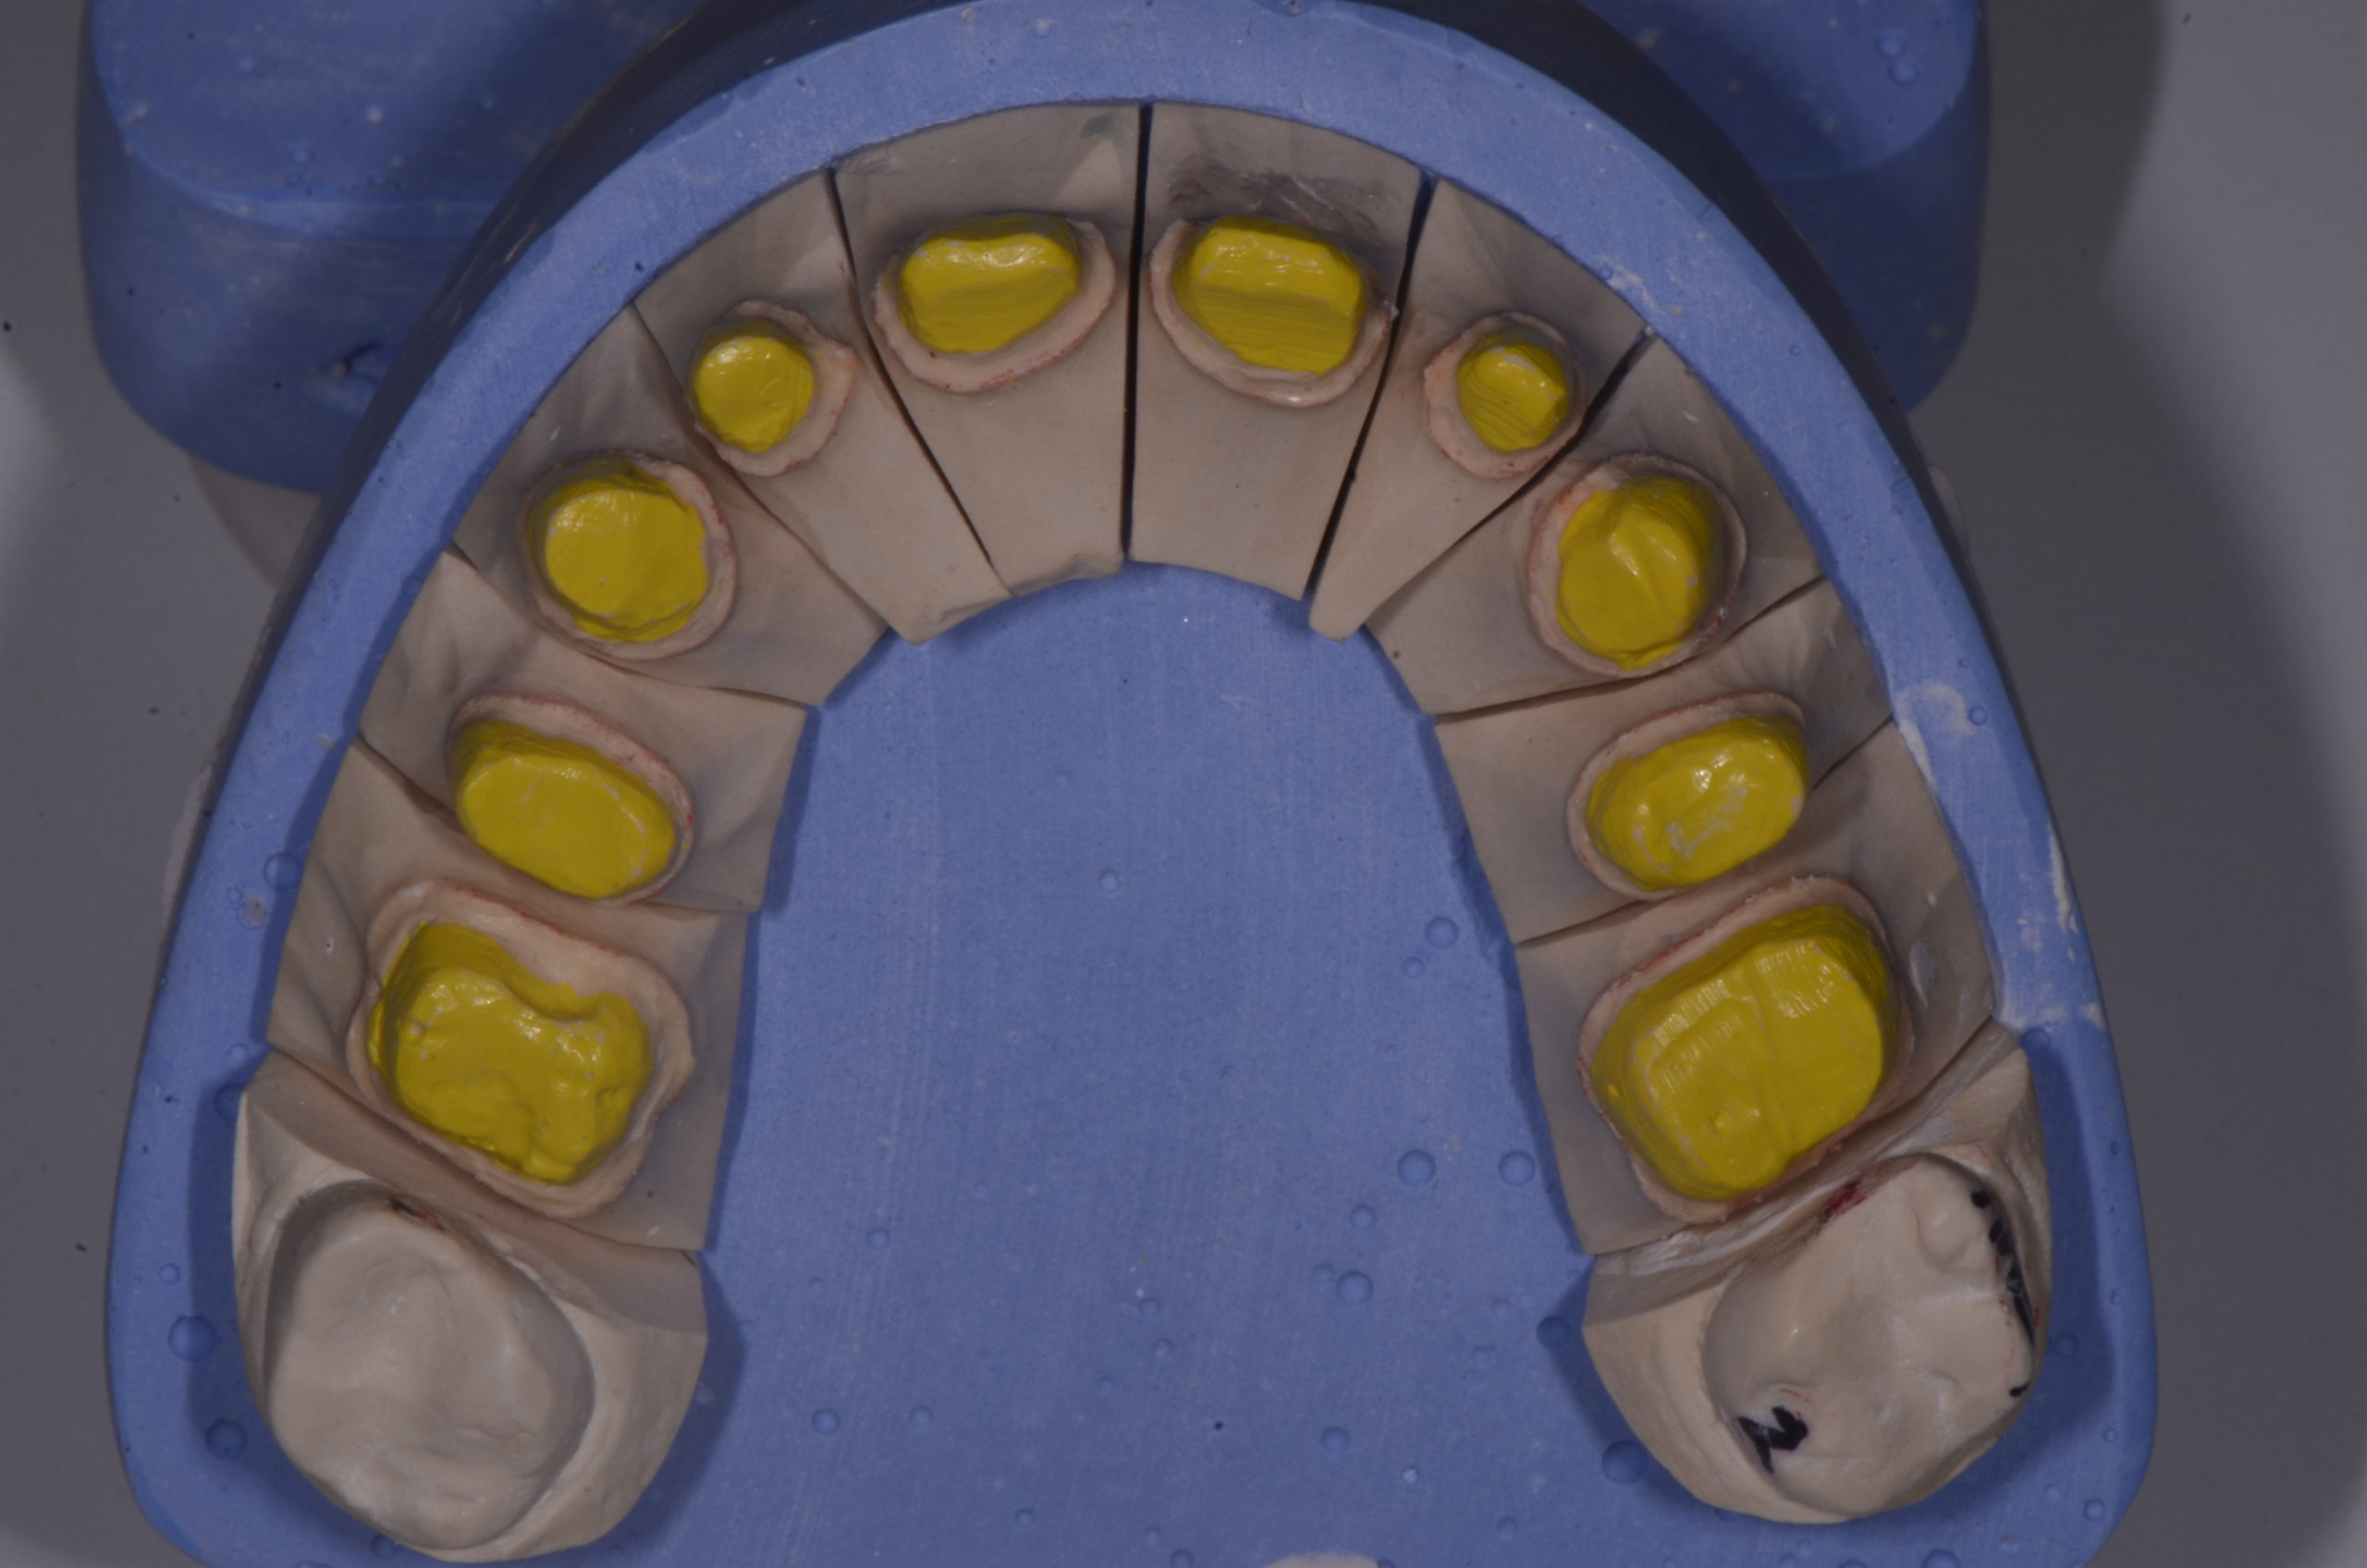
Figure 9
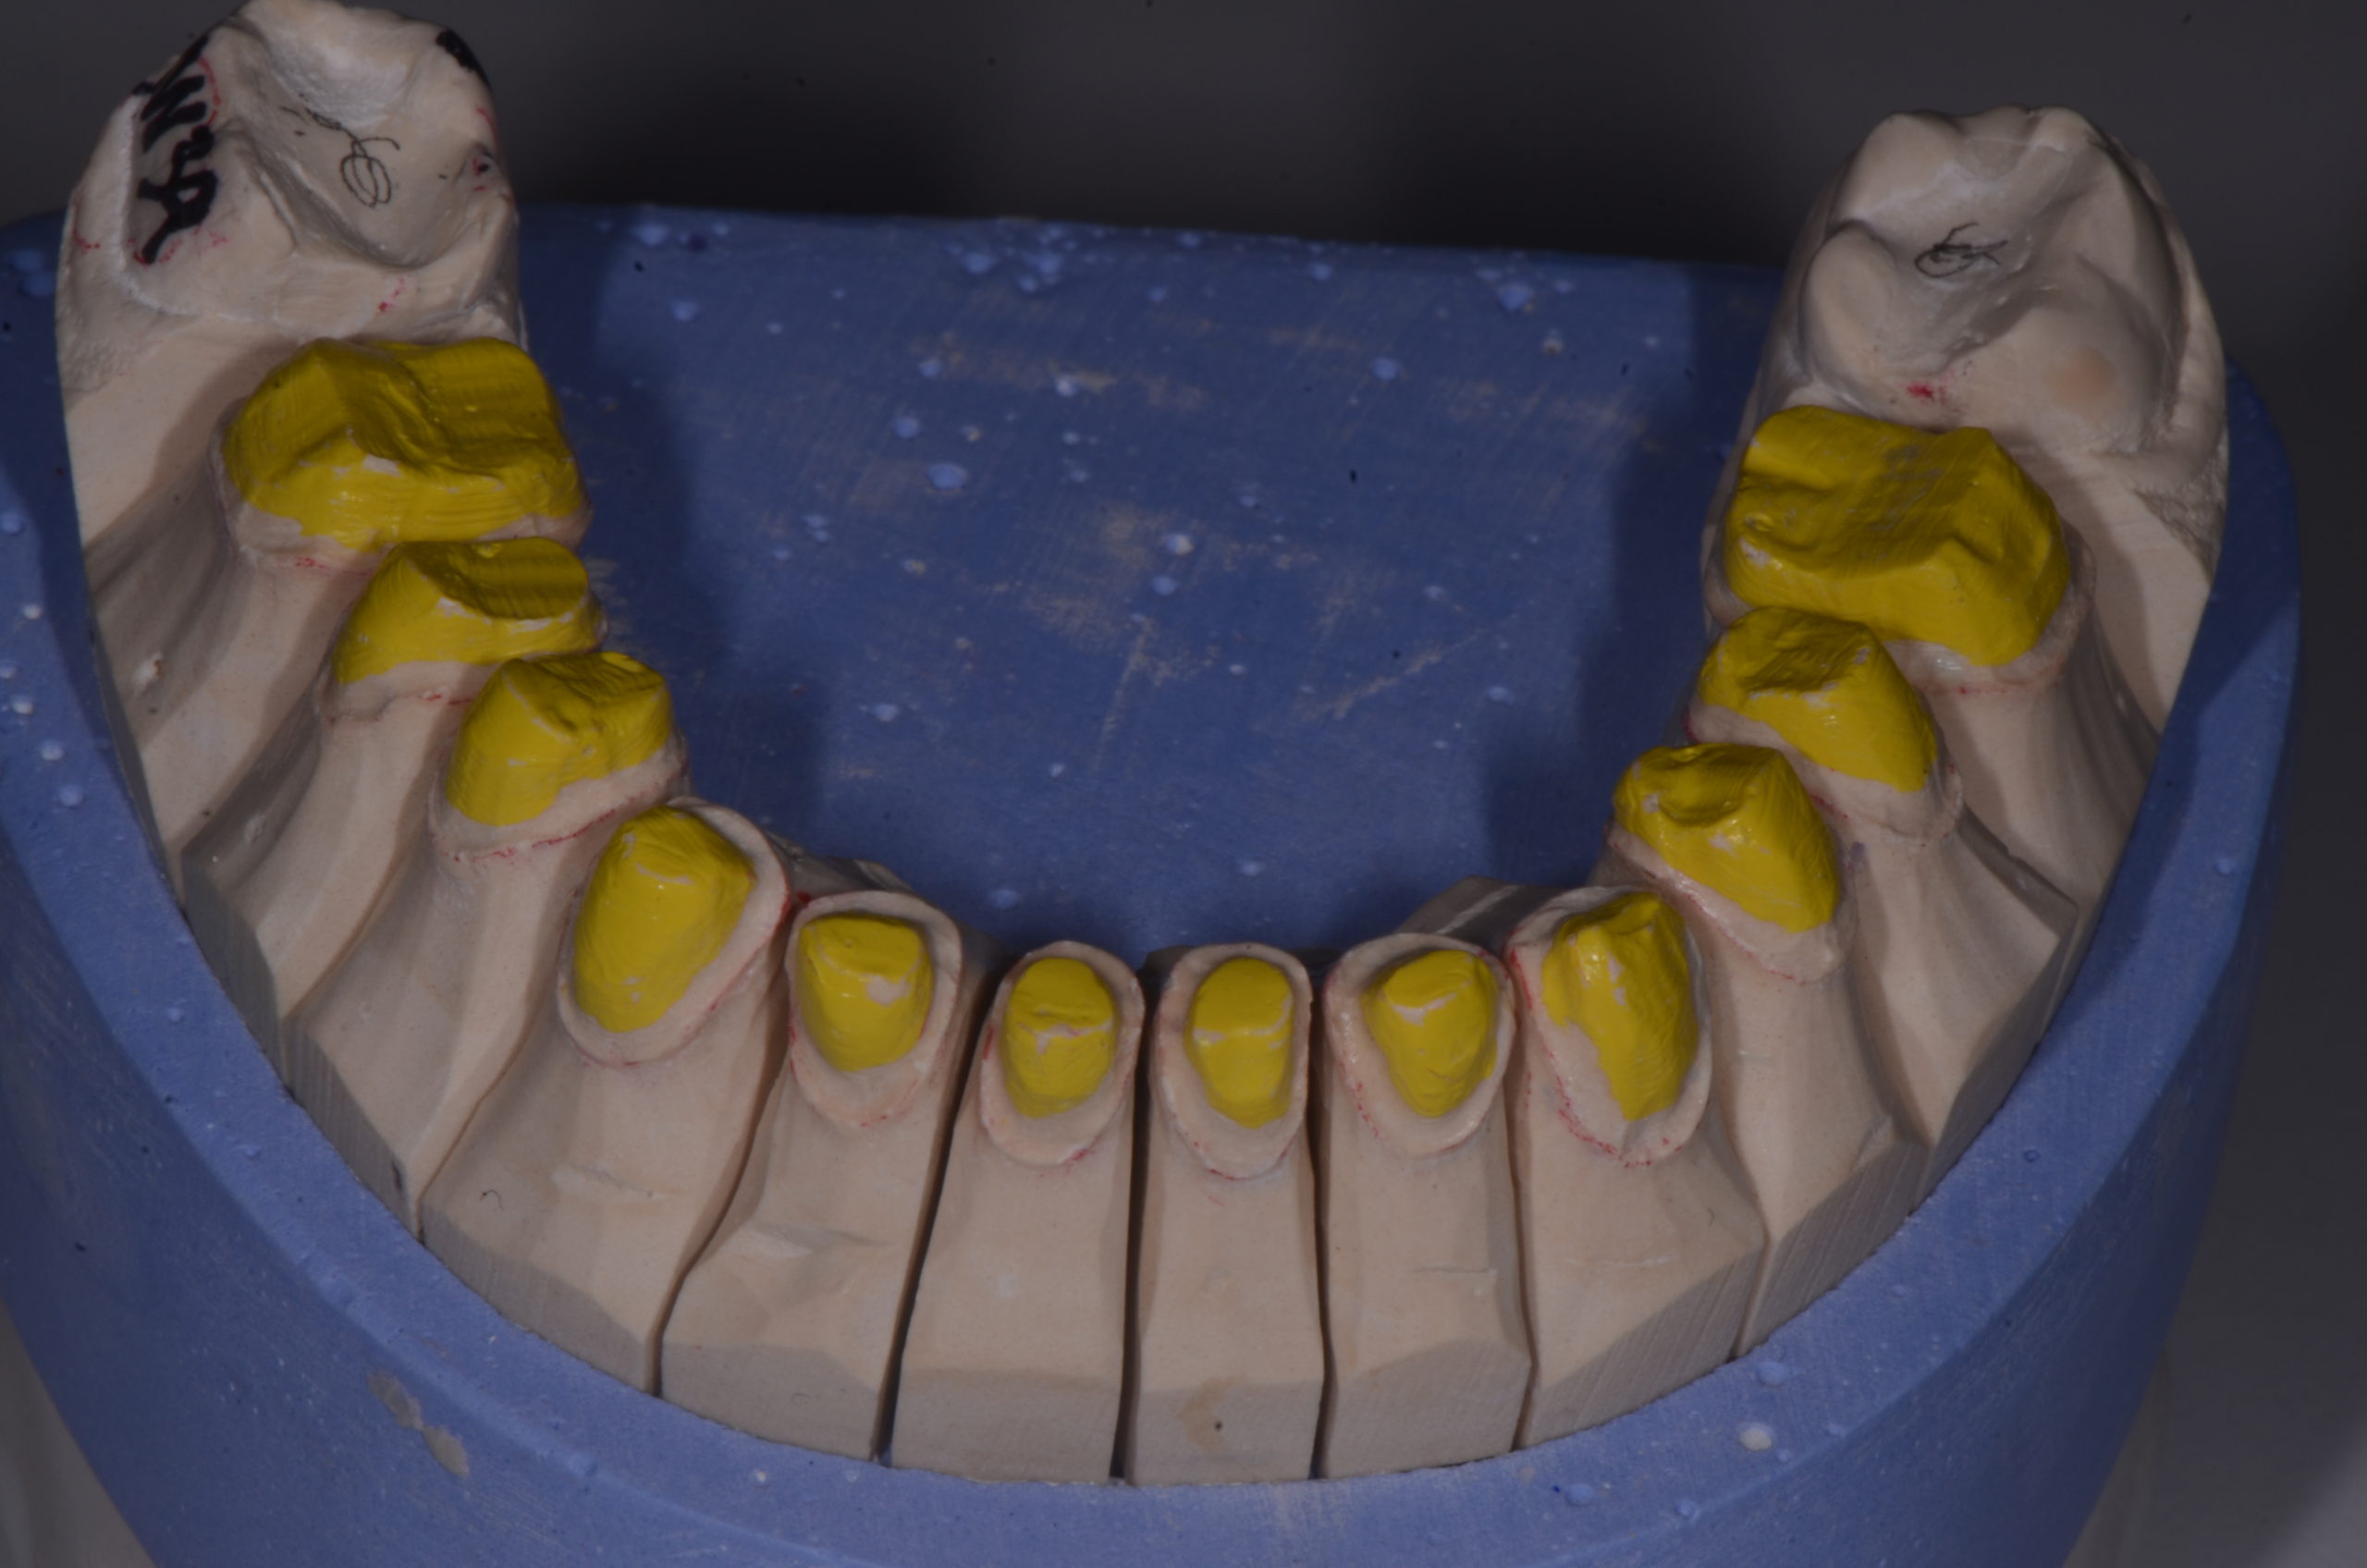
Figure 10
For this case, I wanted to do a “trial run” to check the aesthetics and function, to confirm the accuracy of the bite opening and cast mounting, and also to serve as a trial orthodic appliance to be worn for six weeks.
At the next appointment, I made upper and lower luxatemp prototypes using the temporary matrices that would be used for aesthetic and functional confirmation and to check patient tolerance of the new vertical dimension.
The patient was extremely happy with the smile aesthetics and teeth display. The new vertical dimension enhanced his entire facial appearance. He immediately felt comfortable with the new bite, and protrusive and lateral movements that we created. He functioned very well with this “trial model” for six weeks and was eager to proceed (Figure 11).
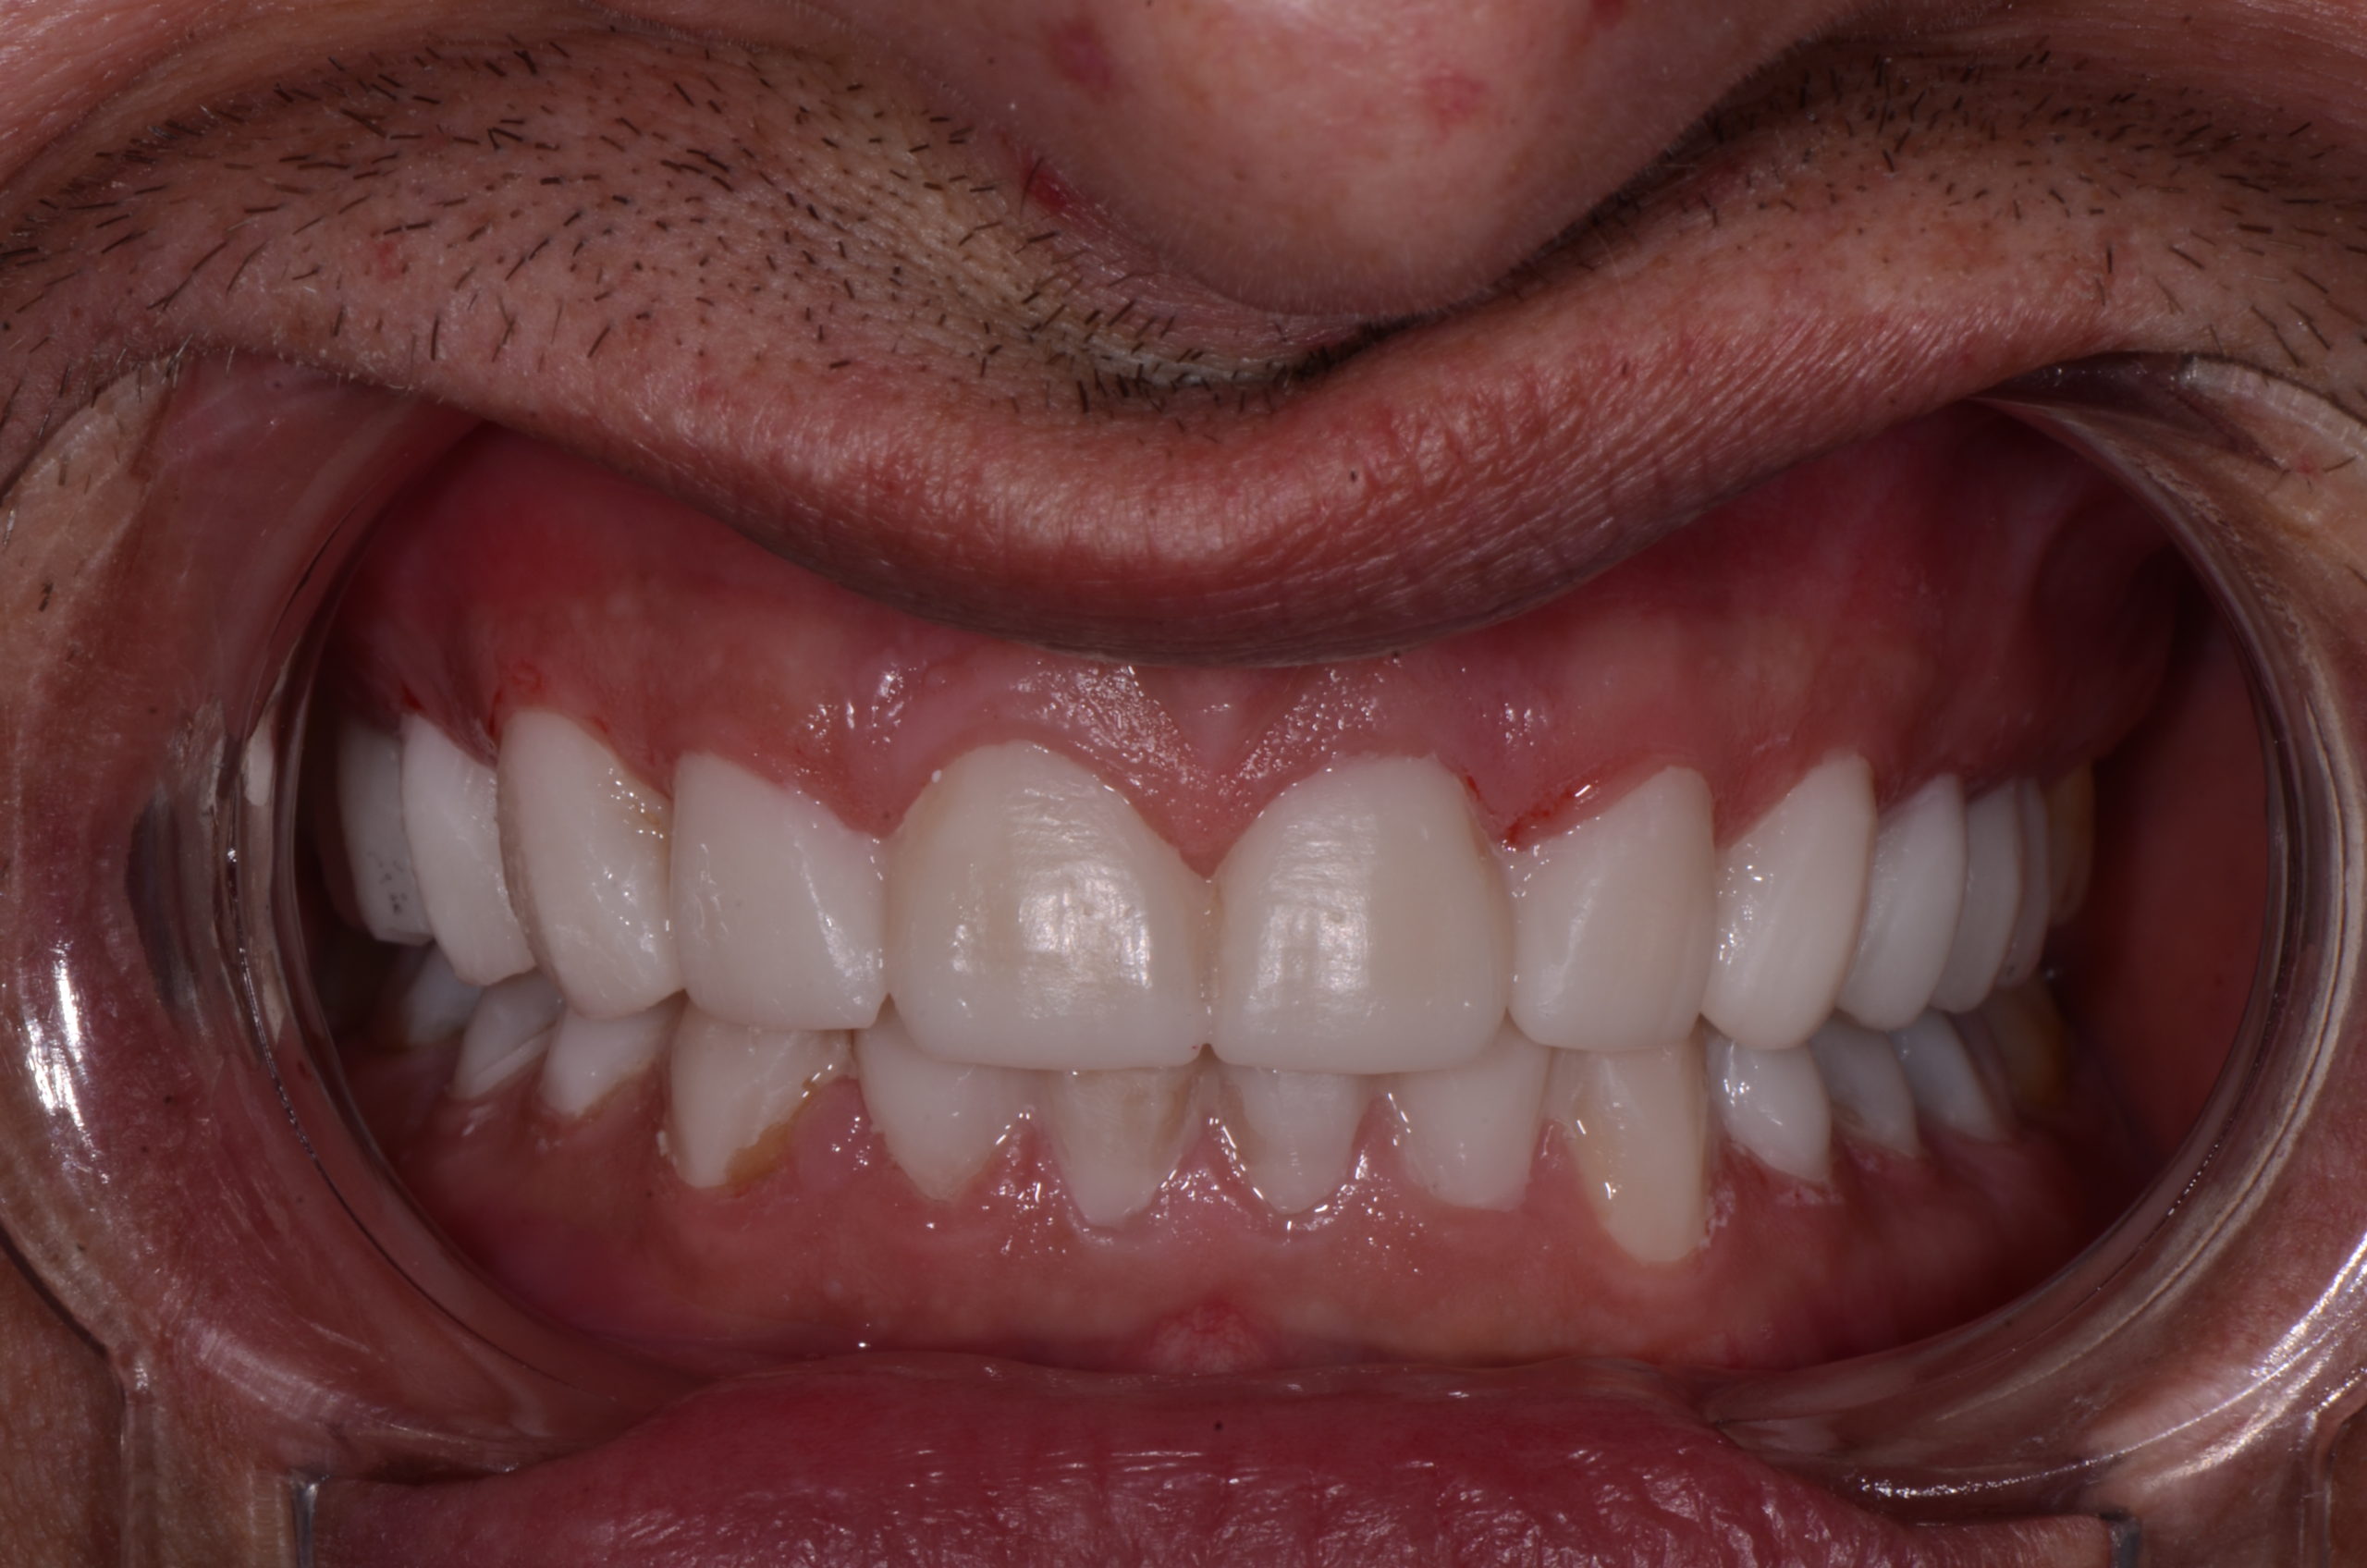
Figure 11
On prep day, I used the prototypes he had worn to prep the teeth and laser the gingival tissue. The bite relation was maintained and checked throughout by prepping the right side (taking the bite registrations), then the left side (and bite registration) and the anteriors, and the final bite registration. We had full control throughout the entire tooth preparation (Figure 12).
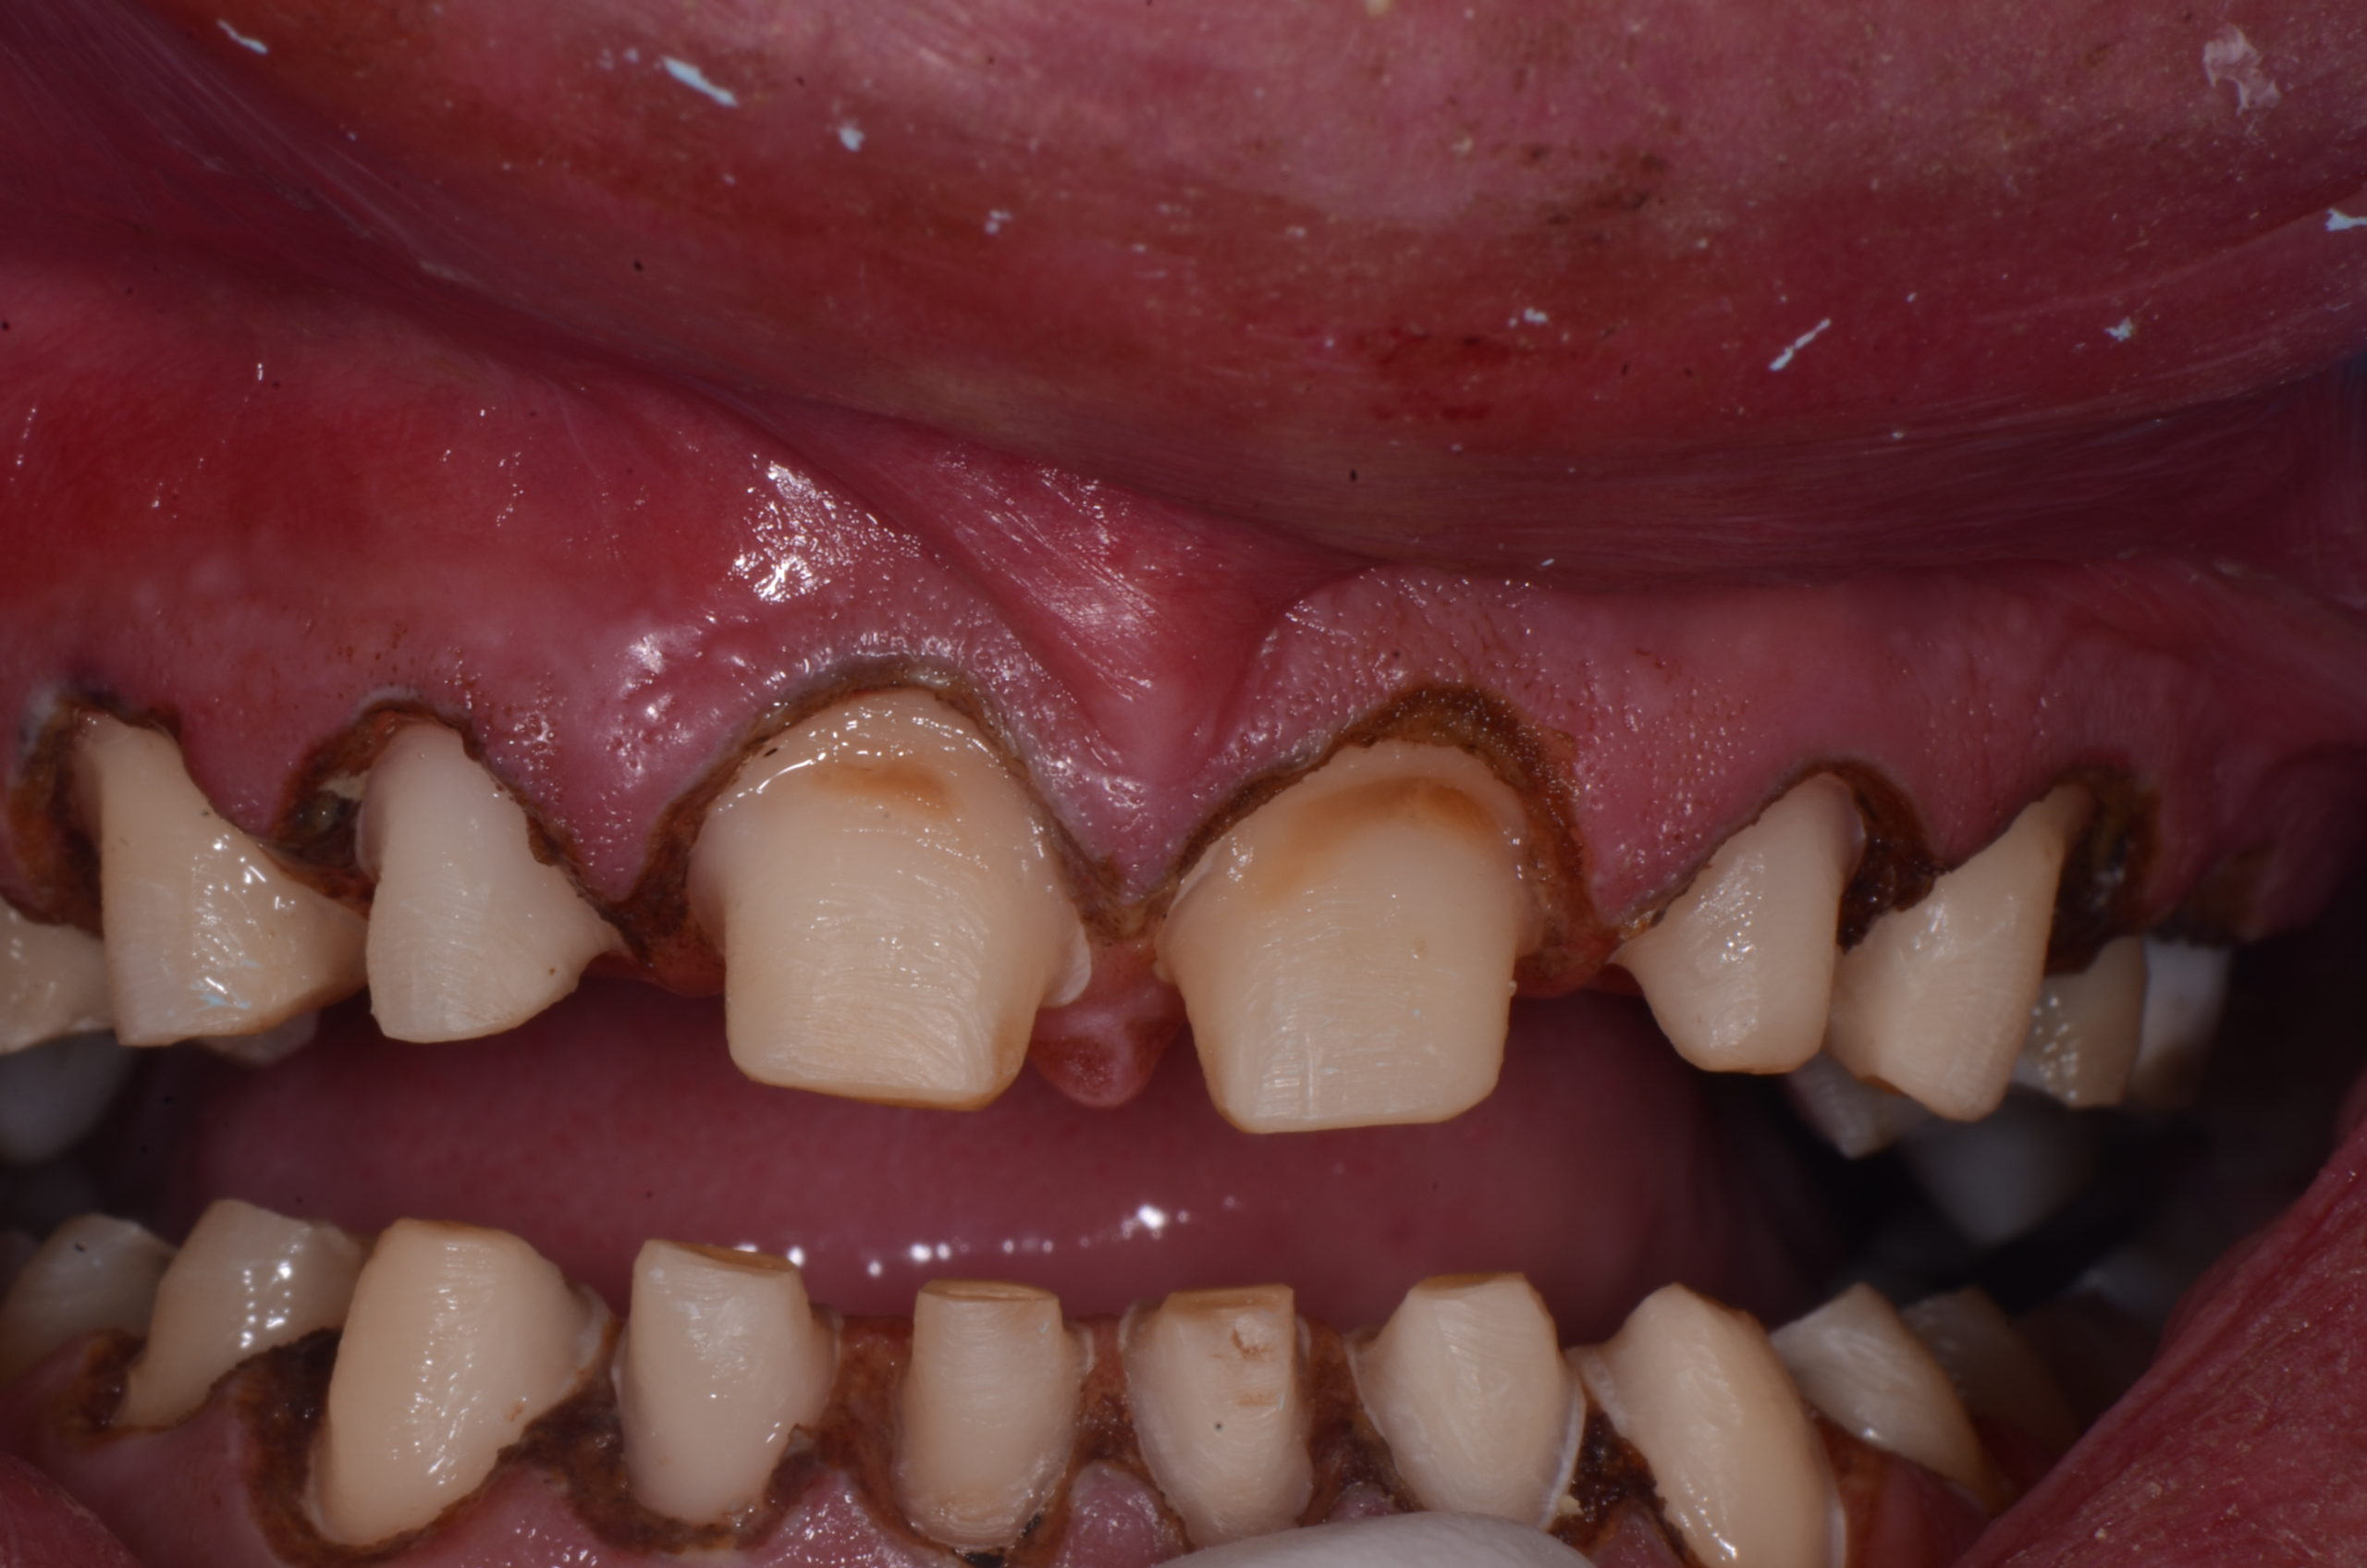
Figure 12
The bites were repeatedly confirmed individually two and three at a time. Each time the patient closed smoothly and consistently in the Centric Relation position. Two impressions for each arch were taken and sent to the laboratory along with a facebow, the bite registrations, photos, and shade selection. Instruction was to follow the wax-up and fabricate e.Max restorations. Temps were fabricated and required minimal adjustment (Figure 13-14).
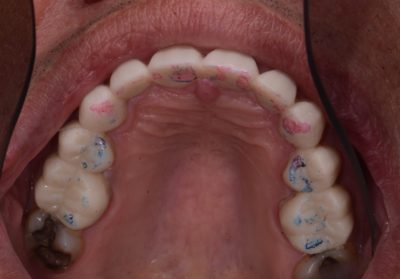
Figure 13
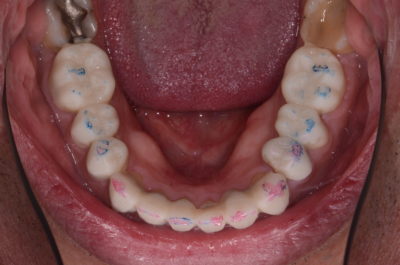
Figure 14
At the seat appointment, all the provisional were removed and the teeth cleaned. The restorations were first reviewed on the models. All restorations were tried to check fit and contacts. Then the patient was instructed to gently close to confirm our bite registration and occlusion prior to permanent cementation. All was perfect.
I cemented the poster teeth with a resin-modified glass ionemer. I bonded the upper and lower anteriors with light-cured luting resin for optimal aesthetics (Figure 15-19).
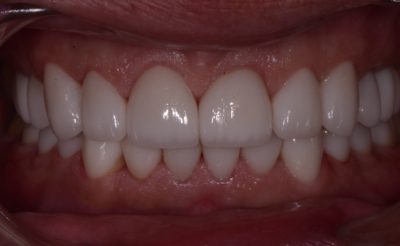
Figure 15
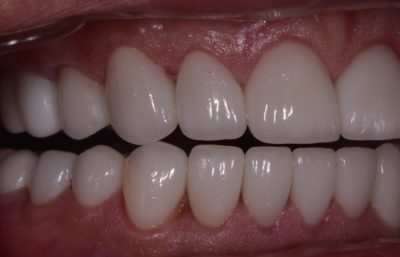
Figure 16
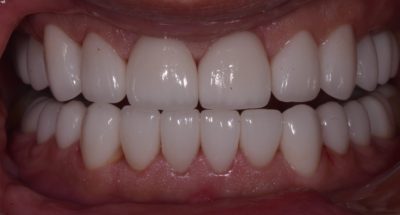
Figure 17
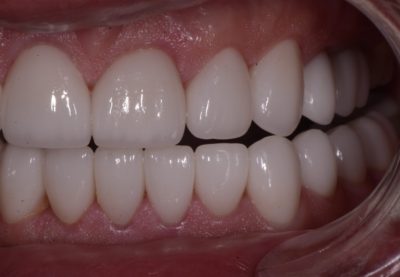
Figure 18
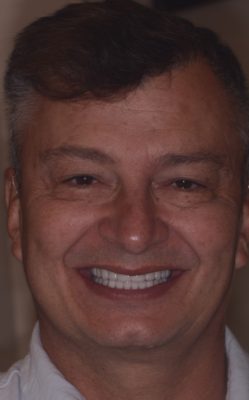
Figure 19
Working with an experienced laboratory throughout this case with precision model work and articulation, wax-up prep guides, and temporary matrices is paramount to success. The fabrication of these beautiful and functional restorations is a group effort of doctor, skilled ceramists, waxers, model people, and smile designers.
Thank you, Gary Vaughn and your wonderful team at Corr Dental Designs/Pacific Aesthetic Laboratory Group for this beautiful and precise reconstruction case.
If you have questions about my article or if you would like to send a case, please contact the Pacific Aesthetic Laboratory Group at www.pacificaestheticdentalstudio.com, Gary Vaughn, CDT, CTO, (888) 461-3331, or via email [email protected].