

Dr. Samir Ayoub
I recently completed a Smile Design case that had some interesting challenges but resulted in a very nice cosmetic and functional outcome. The patient presented with concern for her protruding and flared central incisors and an excessive gummy smile. She wanted an attractive smile and white teeth.
After an initial examination of her dentition, her deep bite, the excessive horizontal and vertical overbite, very protrusive centrals, and the excessive gingival display, I advised her of the difficulty and challenges of creating the smile she desired.
She decided to proceed with a full series of x-rays, mounted study models, and photos. She also agreed to a cosmetic and functional diagnostic wax-up (Figures 1-3).
At the second consultation, I reviewed with her the need to open the vertical dimension. I advised her of my inability to determine the condition and restorability of tooth #8 as well as the questionable European implant and crown on #9. We also discussed the pros and cons of orthodontics, periodontics, endodontics, and implants as well as orthognathic surgery. She understood her options and wished to proceed with cosmetic and functional restorative work on teeth #3 to #13 and placed her confidence and trust in my experience and judgment.
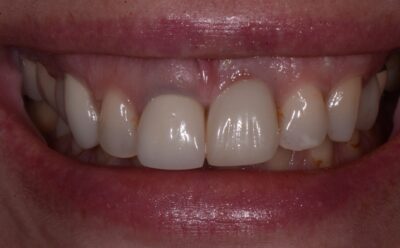
Figure 1
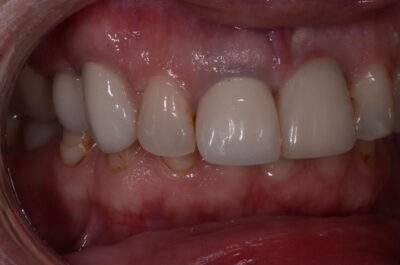
Figure 2
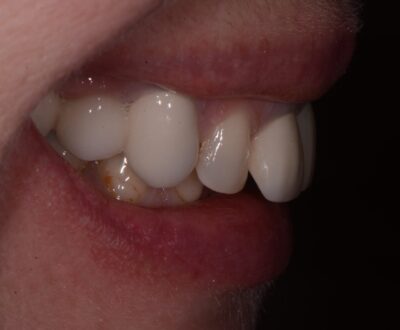
Figure 3
On the prep day, I utilized extensively the perfectly done wax-up, reduction guides, temporary mold, and open vertical bite registration guide to more accurately prep the teeth and laser the gingival tissue for optimal function and aesthetics (Figure 4).
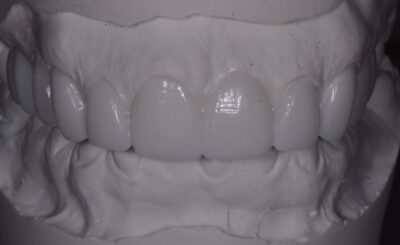
Figure 4
After the removal of the crown on #8, I found a very dark, almost black tooth. It also had a large post with thin and weakened tooth structure. I prepped the tooth carefully allowing extra reduction to bond a white core material to block the discoloration. I was also careful in the use of potholes and subgingival grooves.
To raise the gingival tissue, I used a laser and brought the tissue up almost 3 mm to match #9. Finding the facial bone to be only about 1 mm from the tissue, I hand instrumented with a chisel developed by Dr. Kois. Placing the narrow chisel (Brassler) into the sulcus and feeling the bone, I gently carved and contoured the thin facial bone to a depth that would allow the tissue to heal at the desired level and leave a 2-3 mm sulcus for biologic considerations.
I prepped the layered zirconia crown on the implant tooth #9 carefully and with plenty of water spray. I did not want the crown to fracture which would have led to more complications.
With the incisal and facial prep guides, I was able to accurately prep #8 and #9 as well as the other teeth to allow the expert ceramists at Corr Dental Designs/Pacific Aesthetic Laboratory Group to replicate the wax-up and provisional restorations (Figures 5-7).
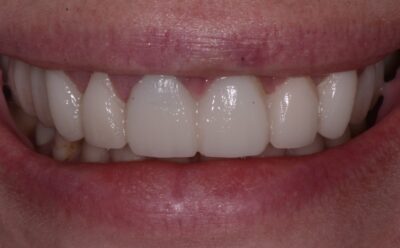
Figure 5
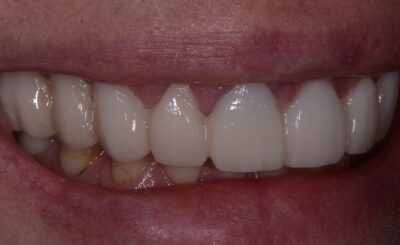
Figure 6
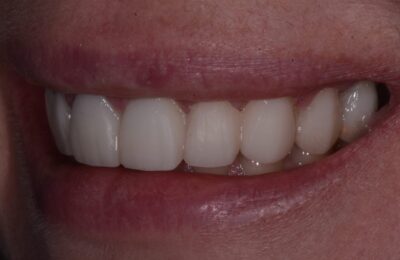
Figure 7
I used the laser on the rest of the gingival tissue to create symmetry and help reduce the gummy smile. A coarse football diamond was used to sculpt a definitive pontic site crestal and buccal #5 to allow buccal fullness and height (Figures 8-10).
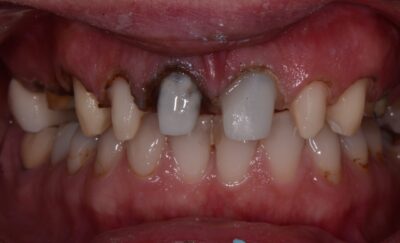
Figure 8
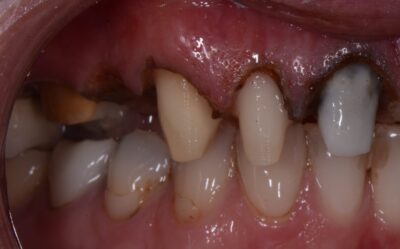
Figure 9

Figure 10
The provisional restorations were perfect and needed no adjustments. The vertical bite opening was ideal as well as the tissue contouring and pontic site creation. And most important was the correction of the excessive flair of central teeth (Figures 11-13).
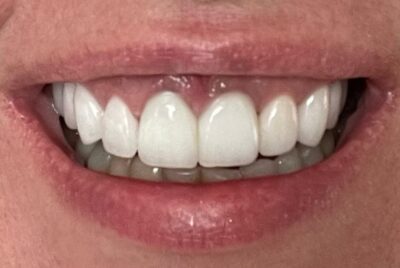
Figure 11
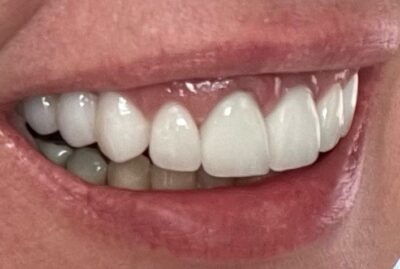
Figure 12
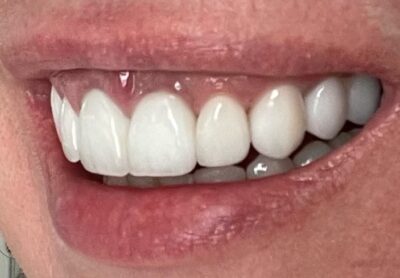
Figure 13
The final result created by the artisans at Corr Dental Designs/Pacific Aesthetic Laboratory Group headed by Gary Vaughn, CTO, CDT, is evident in the photographs.
If you would like to send a case, please contact the Pacific Aesthetic Laboratory Group at www.pacificaestheticdentalstudio.com, Gary Vaughn, CDT, CTO (916) 786-6740, or via email [email protected].